有关MAVEN仓库的理解参见:http://blog.csdn.net/wanghantong/article/details/36427433
MAVEN依赖关系中Scope的作用
Dependency Scope 在POM 4中,<dependency>中还引入了<scope>,它主要管理依赖的部署。目前依赖项的作用域<scope>可以使用5个值:
在定义项目的依赖项的时候,我们可以通过scope来指定该依赖项的作用范围。scope的取值有compile、runtime、test、provided、system和import。
compile:这是依赖项的默认作用范围,即当没有指定依赖项的scope时默认使用compile。compile范围内的依赖项在所有情况下都是有效的,包括运行、测试和编译时。
runtime:表示该依赖项只有在运行时才是需要的,在编译的时候不需要。这种类型的依赖项将在运行和test的类路径下可以访问。
test:表示该依赖项只对测试时有用,包括测试代码的编译和运行,对于正常的项目运行是没有影响的。
provided:表示该依赖项将由JDK或者运行容器在运行时提供,也就是说由Maven提供的该依赖项我们只有在编译和测试时才会用到,而在运行时将由JDK或者运行容器提供。
system:当scope为system时,表示该依赖项是我们自己提供的,不需要Maven到仓库里面去找。指定scope为system需要与另一个属性元素systemPath一起使用,它表示该依赖项在当前系统的位置,使用的是绝对路径。
?
POM文件里面可以引用一些内置属性(Maven预定义可以直接使用)

${basedir} 项目根目录
${version}表示项目版本;
${project.basedir}同${basedir};
${project.version}表示项目版本,与${version}相同;
${project.build.directory} 构建目录,缺省为target
${project.build.sourceEncoding}表示主源码的编码格式;
${project.build.sourceDirectory}表示主源码路径;
${project.build.finalName}表示输出文件名称;
${project.build.outputDirectory} 构建过程输出目录,缺省为target/classes
?
如何在Maven项目中引入本地包呢?
比如我从其它项目打一个jar包,引入到现有项目中。
方法一:将待引入的包放在目录下如lib目录下,修改pom文件,加入依赖并且scope要设置为system
?
  <dependencies>
  	<dependency>
  		<groupId>com.fbcds</groupId>
  		<artifactId>fbcds</artifactId>
  		<version>1.0</version>
  		<scope>system</scope>
  		<systemPath>${project.basedir}/lib/fbcds.jar</systemPath>
  	</dependency>
  </dependencies>
?
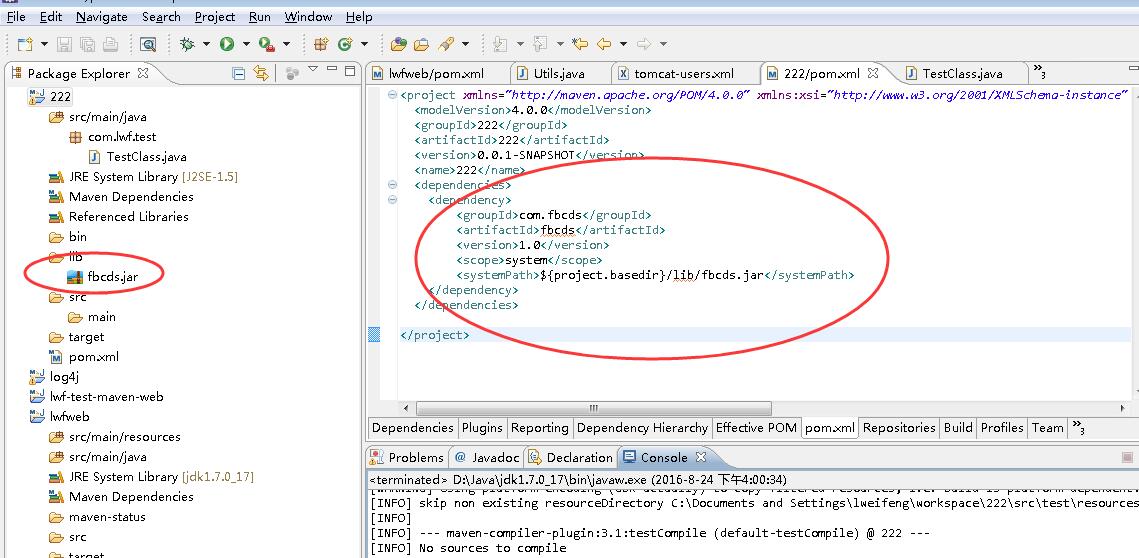
?上面设置完成后,运行mvn package命令执行成功。但打出来的包里面不包含lib目录和fbcds.jar这个引用的包,即打出来的包不是可执行的jar。所以个人开发的话可以使用这种方式,如果团队开发请使用方法二。
?
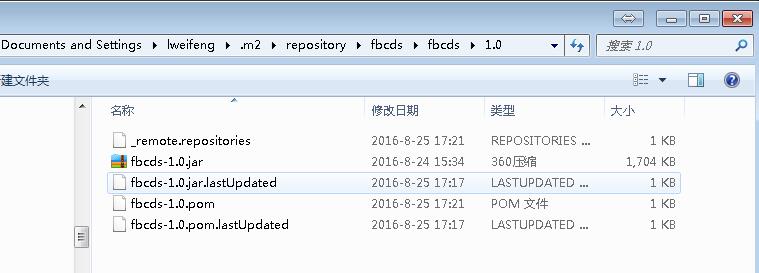
方法二:将待引入的jar包安装到本地repository中
1、先把待引入的jar包放在一个目录下,需要改一下包名,如fbcds.jar修改成fbcds-1.0.jar,如F:\lib目录,在命令行CD到lib目录,执行以下命令:
	mvn install:install-file -Dfile=fbcds-1.0.jar -DgroupId=fbcds -DartifactId=fbcds -Dversion=1.0 -Dpackaging=jar
	mvn install:install-file -Dfile=ojdbc7-1.0.jar -DgroupId=ojdbc7 -DartifactId=ojdbc7 -Dversion=1.0 -Dpackaging=jar
?2、修改项目pom文件加入包对应的依赖
?
<dependencies>
  	<dependency>
      <groupId>log4j</groupId>
      <artifactId>log4j</artifactId>
      <version>1.2.17</version>
    </dependency>
    <dependency>
      <groupId>fbcds</groupId>
      <artifactId>fbcds</artifactId>
      <version>1.0</version>
    </dependency>
    <dependency>
      <groupId>ojdbc7</groupId>
      <artifactId>ojdbc7</artifactId>
      <version>1.0</version>
    </dependency>
  </dependencies>
?上面的fbcds和ojdbc7就是新加的引用包的依赖。
?完成后,在本地仓库可看到对应的文件夹内容:
?
MAVEN如何打可执行的JAR包
前提条件:已成功将待引入的jar包安装到本地repository中
方法一、使用maven-shade-plugin插件打可执行的jar包
插件查找链接:http://maven.apache.org/plugins/
1、测试类代码
?
package com.lwf.test;

import java.sql.Connection;
import java.sql.DriverManager;
import java.sql.ResultSet;
import java.sql.SQLException;
import java.sql.Statement;

import com.eclink.fbcis.store.StoreDao;

public class TestClass {
	public static void main(String[] args) {
		StoreDao a = new StoreDao();
		System.out.println("------" + a.toString());
		Connection con = null;
		Statement st = null;
		ResultSet rs = null;
		try {
			String sql = "select * from temp_head where temp_no='C530015I19008015'";
			Class.forName("oracle.jdbc.driver.OracleDriver");
			con = DriverManager.getConnection("jdbc:oracle:thin:@//10.101.2.19:1521/pdbqmytcis","qmytcis","qmytcis123");
			st = con.createStatement();
			rs = st.executeQuery(sql);
			if(rs.next()){
				System.out.println(rs.getString("temp_no"));
			}

		} catch (Exception e) {
			e.printStackTrace();
		} finally{
			try {
				rs.close();
				st.close();
				con.close();
			} catch (SQLException e) {
				e.printStackTrace();
			}
		}
	}
}
?上面类中引用到了fbcds和ojdbc7包的内容。
2、对应pom文件
<project xmlns="http://maven.apache.org/POM/4.0.0" xmlns:xsi="http://www.w3.org/2001/XMLSchema-instance" xsi:schemaLocation="http://maven.apache.org/POM/4.0.0 http://maven.apache.org/xsd/maven-4.0.0.xsd">
  <modelVersion>4.0.0</modelVersion>
  <groupId>222</groupId>
  <artifactId>222</artifactId>
  <version>0.0.1-SNAPSHOT</version>
  <name>222</name>
  <dependencies>
  	<dependency>
      <groupId>log4j</groupId>
      <artifactId>log4j</artifactId>
      <version>1.2.17</version>
    </dependency>
    <dependency>
      <groupId>fbcds</groupId>
      <artifactId>fbcds</artifactId>
      <version>1.0</version>
    </dependency>
    <dependency>
      <groupId>ojdbc7</groupId>
      <artifactId>ojdbc7</artifactId>
      <version>1.0</version>
    </dependency>
  </dependencies>
	<build>
        <plugins>
            <plugin>
                <groupId>org.apache.maven.plugins</groupId>
                <artifactId>maven-shade-plugin</artifactId>
                <version>2.4.3</version>
                <executions>
                    <execution>
                        <phase>package</phase>
                        <goals>
                            <goal>shade</goal>
                        </goals>
                        <configuration>
                            <transformers>
                                <transformer implementation="org.apache.maven.plugins.shade.resource.ManifestResourceTransformer">
                                    <mainClass>com.lwf.test.TestClass</mainClass>
                                </transformer>
                            </transformers>
                        </configuration>
                    </execution>
                </executions>
            </plugin>
        </plugins>
    </build>

</project>
?在eclipse中右键项目run as 选择Maven package,可看打包的target目录内容:
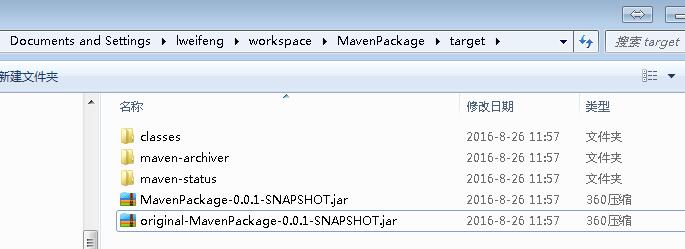
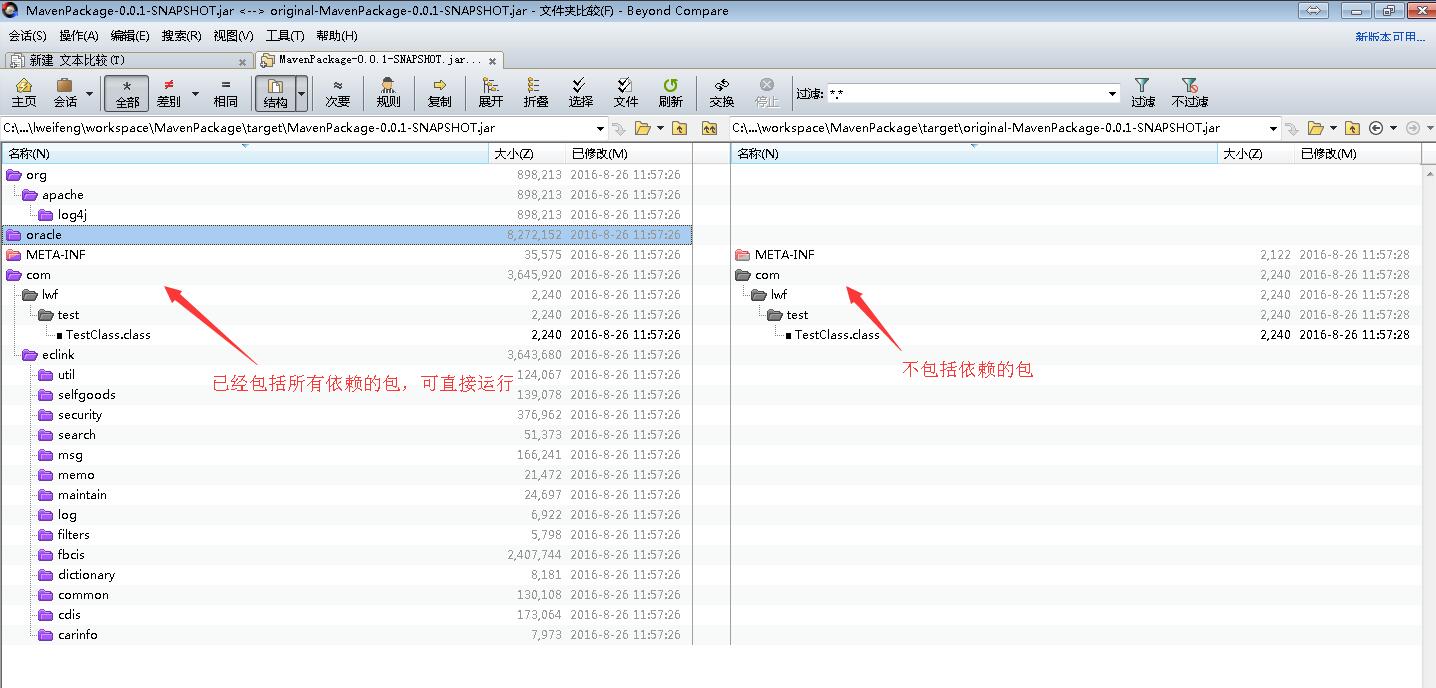
?比较两个包内容:
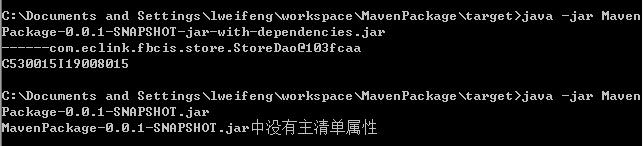
?执行包:cmd下
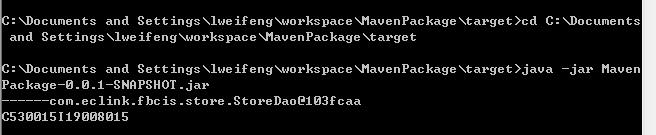
?original-MavenPackage-0.0.1-SNAPSHOT.jar中没有主清单属性是执行不了的。
?参见:http://www.mkyong.com/maven/create-a-fat-jar-file-maven-shade-plugin/
方法二、使用maven-assembly-plugin插件打可执行的jar包
测试类与方法一中一样,只是pom不一样,pom文件如下:
<project xmlns="http://maven.apache.org/POM/4.0.0" xmlns:xsi="http://www.w3.org/2001/XMLSchema-instance" xsi:schemaLocation="http://maven.apache.org/POM/4.0.0 http://maven.apache.org/xsd/maven-4.0.0.xsd">
  <modelVersion>4.0.0</modelVersion>
  <groupId>com.lwf.MavenPackage</groupId>
  <artifactId>MavenPackage</artifactId>
  <version>0.0.1-SNAPSHOT</version>
  <name>MavenPackage</name>
  <dependencies>
  	<dependency>
      <groupId>log4j</groupId>
      <artifactId>log4j</artifactId>
      <version>1.2.17</version>
    </dependency>
    <dependency>
      <groupId>fbcds</groupId>
      <artifactId>fbcds</artifactId>
      <version>1.0</version>
    </dependency>
    <dependency>
      <groupId>ojdbc7</groupId>
      <artifactId>ojdbc7</artifactId>
      <version>1.0</version>
    </dependency>
  </dependencies>
	<build>
        <plugins>
<!-- 使用 maven-shade-plugin插件打可执行包-->
<!--
            <plugin>
                <groupId>org.apache.maven.plugins</groupId>
                <artifactId>maven-shade-plugin</artifactId>
                <version>2.4.3</version>
                <executions>
                    <execution>
                        <phase>package</phase>
                        <goals>
                            <goal>shade</goal>
                        </goals>
                        <configuration>
                            <transformers>
                                <transformer implementation="org.apache.maven.plugins.shade.resource.ManifestResourceTransformer">
                                    <mainClass>com.lwf.test.TestClass</mainClass>
                                </transformer>
                            </transformers>
                        </configuration>
                    </execution>
                </executions>
            </plugin>
-->

<!-- 使用 maven-Assembly-plugin插件打可执行包-->
            <plugin>
                <groupId>org.apache.maven.plugins</groupId>
                <artifactId>maven-assembly-plugin</artifactId>
                <version>2.6</version>
                <configuration>
                    <!-- get all project dependencies -->
                    <descriptorRefs>
                        <descriptorRef>jar-with-dependencies</descriptorRef>
                    </descriptorRefs>
                    <!-- MainClass in mainfest make a executable jar -->
                    <archive>
                      <manifest>
                        <mainClass>com.lwf.test.TestClass</mainClass>
                      </manifest>
                    </archive>
                </configuration>
                <executions>
                  <execution>
                    <id>make-assembly</id>
                    <phase>package</phase>
                    <goals>
                        <goal>single</goal>
                    </goals>
                  </execution>
                </executions>
            </plugin>
        </plugins>
    </build>

</project>
?修改完pom后,在eclipse中右键项目run as 选择Maven package,可看打包的target目录内容:
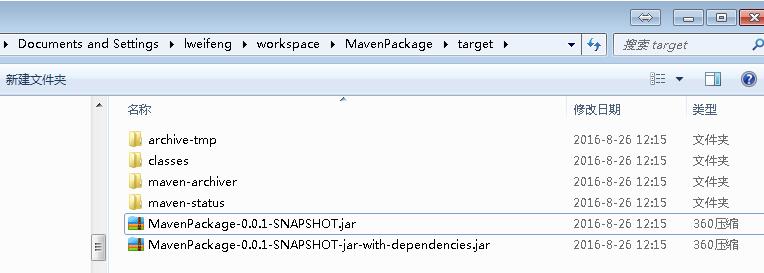
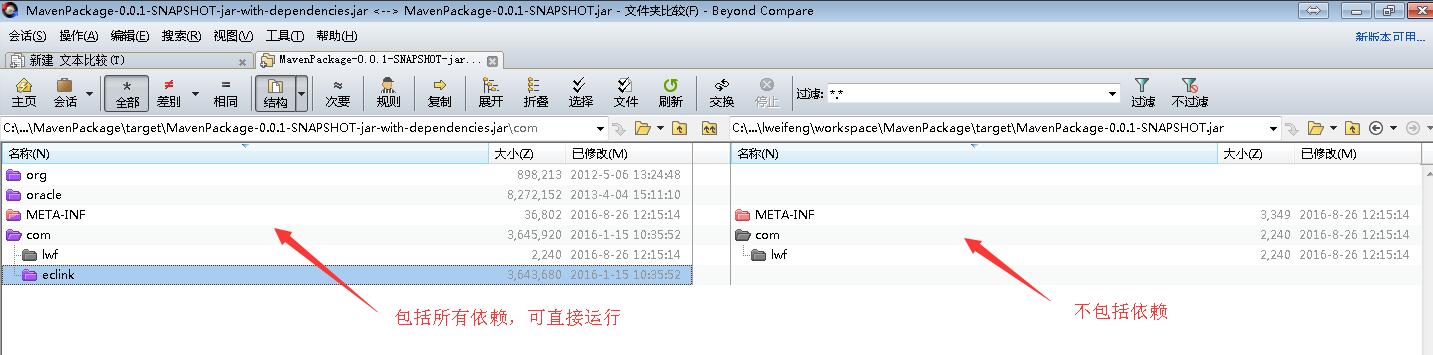
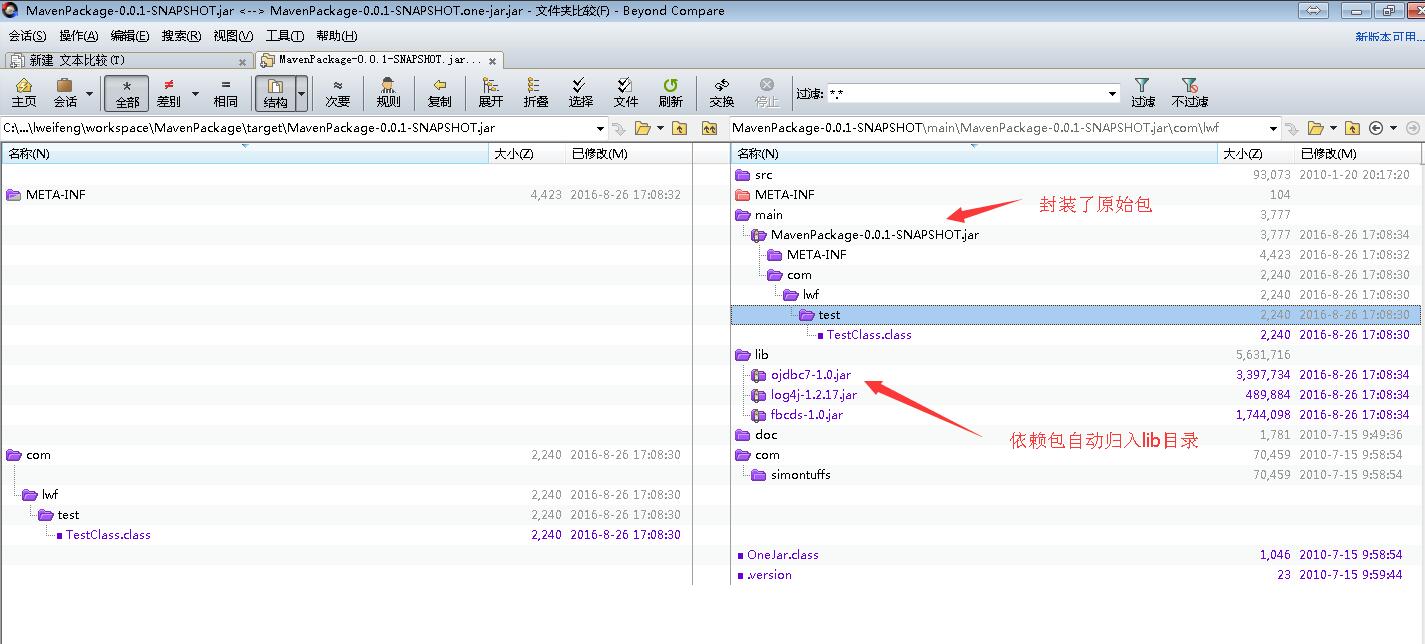
?两个jar文件比较:
?
?
?参见:http://www.mkyong.com/maven/create-a-fat-jar-file-maven-assembly-plugin/
方法三、使用onejar-maven-plugin插件打可执行的jar包
测试类与方法一中一样,只是pom不一样,pom文件如下:
<project xmlns="http://maven.apache.org/POM/4.0.0" xmlns:xsi="http://www.w3.org/2001/XMLSchema-instance" xsi:schemaLocation="http://maven.apache.org/POM/4.0.0 http://maven.apache.org/xsd/maven-4.0.0.xsd">
  <modelVersion>4.0.0</modelVersion>
  <groupId>com.lwf.MavenPackage</groupId>
  <artifactId>MavenPackage</artifactId>
  <version>0.0.1-SNAPSHOT</version>
  <name>MavenPackage</name>
  <dependencies>
  	<dependency>
      <groupId>log4j</groupId>
      <artifactId>log4j</artifactId>
      <version>1.2.17</version>
    </dependency>
    <dependency>
      <groupId>fbcds</groupId>
      <artifactId>fbcds</artifactId>
      <version>1.0</version>
    </dependency>
    <dependency>
      <groupId>ojdbc7</groupId>
      <artifactId>ojdbc7</artifactId>
      <version>1.0</version>
    </dependency>
  </dependencies>
	<build>
        <plugins>
<!-- 使用 maven-shade-plugin插件打可执行包-->
<!--
            <plugin>
                <groupId>org.apache.maven.plugins</groupId>
                <artifactId>maven-shade-plugin</artifactId>
                <version>2.4.3</version>
                <executions>
                    <execution>
                        <phase>package</phase>
                        <goals>
                            <goal>shade</goal>
                        </goals>
                        <configuration>
                            <transformers>
                                <transformer implementation="org.apache.maven.plugins.shade.resource.ManifestResourceTransformer">
                                    <mainClass>com.lwf.test.TestClass</mainClass>
                                </transformer>
                            </transformers>
                        </configuration>
                    </execution>
                </executions>
            </plugin>
-->

<!-- 使用 maven-Assembly-plugin插件打可执行包-->
<!--
            <plugin>
                <groupId>org.apache.maven.plugins</groupId>
                <artifactId>maven-assembly-plugin</artifactId>
                <version>2.6</version>
                <configuration>
                    <descriptorRefs>
                        <descriptorRef>jar-with-dependencies</descriptorRef>
                    </descriptorRefs>
                    <archive>
                      <manifest>
                        <mainClass>com.lwf.test.TestClass</mainClass>
                      </manifest>
                    </archive>
                </configuration>
                <executions>
                  <execution>
                    <id>make-assembly</id>
                    <phase>package</phase>
                    <goals>
                        <goal>single</goal>
                    </goals>
                  </execution>
                </executions>
            </plugin>
-->
			<!-- 使用 onejar-maven-plugin插件打可执行包-->
			<plugin>
                <groupId>org.apache.maven.plugins</groupId>
                <artifactId>maven-jar-plugin</artifactId>
                <configuration>
                    <archive>
                        <manifest>
                            <mainClass>com.lwf.test.TestClass</mainClass>
                        </manifest>
                    </archive>
                </configuration>
            </plugin>
            <plugin>
                <groupId>com.jolira</groupId>
                <artifactId>onejar-maven-plugin</artifactId>
                <version>1.4.4</version>
                <executions>
                    <execution>
                        <configuration>
                            <attachToBuild>true</attachToBuild>
                            <classifier>onejar</classifier>
                        </configuration>
                        <goals>
                            <goal>one-jar</goal>
                        </goals>
                    </execution>
                </executions>
            </plugin>
        </plugins>
    </build>
</project>
打包截图如下:
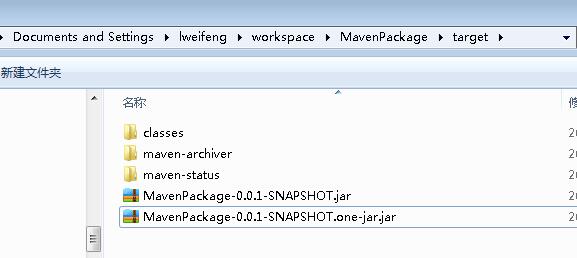
?

?
?
参见:http://www.mkyong.com/maven/maven-create-a-fat-jar-file-one-jar-example/
上文中因googlecode中已没有onejar-maven-plugin所以另请参见下文:
http://my.oschina.net/noahxiao/blog/78241
方法四:使用maven-jar-plugin和maven-dependency-plugin打可执行包,引用的包放包外面文件夹下
其他不变,pom文件如下
<project xmlns="http://maven.apache.org/POM/4.0.0" xmlns:xsi="http://www.w3.org/2001/XMLSchema-instance" xsi:schemaLocation="http://maven.apache.org/POM/4.0.0 http://maven.apache.org/xsd/maven-4.0.0.xsd">
  <modelVersion>4.0.0</modelVersion>
  <groupId>com.lwf.MavenPackage</groupId>
  <artifactId>MavenPackage</artifactId>
  <version>0.0.1-SNAPSHOT</version>
  <name>MavenPackage</name>
  <dependencies>
  	<dependency>
      <groupId>log4j</groupId>
      <artifactId>log4j</artifactId>
      <version>1.2.17</version>
    </dependency>
    <dependency>
      <groupId>fbcds</groupId>
      <artifactId>fbcds</artifactId>
      <version>1.0</version>
    </dependency>
    <dependency>
      <groupId>ojdbc7</groupId>
      <artifactId>ojdbc7</artifactId>
      <version>1.0</version>
    </dependency>
  </dependencies>
	<build>
        <plugins>
<!-- 方法一:使用 maven-shade-plugin插件打可执行包-->
<!--
            <plugin>
                <groupId>org.apache.maven.plugins</groupId>
                <artifactId>maven-shade-plugin</artifactId>
                <version>2.4.3</version>
                <executions>
                    <execution>
                        <phase>package</phase>
                        <goals>
                            <goal>shade</goal>
                        </goals>
                        <configuration>
                            <transformers>
                                <transformer implementation="org.apache.maven.plugins.shade.resource.ManifestResourceTransformer">
                                    <mainClass>com.lwf.test.TestClass</mainClass>
                                </transformer>
                            </transformers>
                        </configuration>
                    </execution>
                </executions>
            </plugin>
-->

<!-- 方法二:使用 maven-Assembly-plugin插件打可执行包-->
<!--
            <plugin>
                <groupId>org.apache.maven.plugins</groupId>
                <artifactId>maven-assembly-plugin</artifactId>
                <version>2.6</version>
                <configuration>
                    <descriptorRefs>
                        <descriptorRef>jar-with-dependencies</descriptorRef>
                    </descriptorRefs>
                    <archive>
                      <manifest>
                        <mainClass>com.lwf.test.TestClass</mainClass>
                      </manifest>
                    </archive>
                </configuration>
                <executions>
                  <execution>
                    <id>make-assembly</id>
                    <phase>package</phase>
                    <goals>
                        <goal>single</goal>
                    </goals>
                  </execution>
                </executions>
            </plugin>
-->

<!-- 方法三:使用 onejar-maven-plugin插件打可执行包-->
<!--
			<plugin>
                <groupId>org.apache.maven.plugins</groupId>
                <artifactId>maven-jar-plugin</artifactId>
                <configuration>
                    <archive>
                        <manifest>
                            <mainClass>com.lwf.test.TestClass</mainClass>
                        </manifest>
                    </archive>
                </configuration>
            </plugin>
            <plugin>
                <groupId>com.jolira</groupId>
                <artifactId>onejar-maven-plugin</artifactId>
                <version>1.4.4</version>
                <executions>
                    <execution>
                        <configuration>
                            <attachToBuild>true</attachToBuild>
                            <classifier>onejar</classifier>
                        </configuration>
                        <goals>
                            <goal>one-jar</goal>
                        </goals>
                    </execution>
                </executions>
            </plugin>

	 -->

<!-- 方法四:使用maven-jar-plugin和maven-dependency-plugin打可执行包,引用的包放包外面文件夹下 -->
			<plugin>
				<groupId>org.apache.maven.plugins</groupId>
				<artifactId>maven-jar-plugin</artifactId>
				<configuration>
				  <excludes>
					<exclude>**/log4j.properties</exclude>
				  </excludes>
				  <archive>
				    <manifest>
					<addClasspath>true</addClasspath>
					<mainClass>com.lwf.test.TestClass</mainClass>
					<classpathPrefix>lib/</classpathPrefix>
				    </manifest>
				  </archive>
				</configuration>
			</plugin>

			<!-- Copy project dependency -->
			<plugin>
				<groupId>org.apache.maven.plugins</groupId>
				<artifactId>maven-dependency-plugin</artifactId>
				<version>2.5.1</version>
				<executions>
				  <execution>
					<id>copy-dependencies</id>
					<phase>package</phase>
					<goals>
						<goal>copy-dependencies</goal>
					</goals>
					<configuration>
					  <!-- exclude junit, we need runtime dependency only -->
					  <includeScope>runtime</includeScope>
					  <outputDirectory>${project.build.directory}/lib/</outputDirectory>
					</configuration>
				  </execution>
				</executions>
			</plugin>
        </plugins>
    </build>
</project>
?
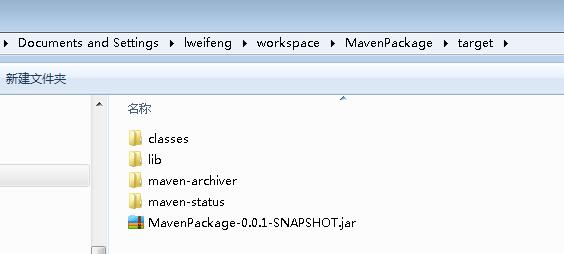
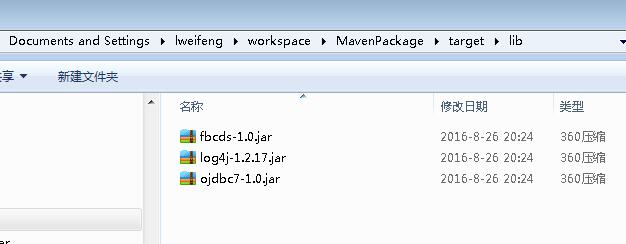

可以看到依赖的包拷贝到了lib目录下,打的包里没有依赖包的信息,只是简单的包,不过Manifest文件class-path要包含引用名的路径
Manifest-Version: 1.0
Built-By: lweifeng
Build-Jdk: 1.7.0_17
Class-Path: lib/log4j-1.2.17.jar lib/fbcds-1.0.jar lib/ojdbc7-1.0.jar
Created-By: Apache Maven 3.3.9
Main-Class: com.lwf.test.TestClass
Archiver-Version: Plexus Archiver
?
?在以上前三种插件打包方式中,maven-shade-plugin和maven-assembly-plugin采取的是将依赖包解压再一并打到新包中,这样依赖包可能存在冲突的时候,导致运行时可能出现未知问题,而onejar-maven-plugin打包是将依赖包自动归入lib目录,不解压原包,相当于在原包基础上加壳,这样可以避免冲突的发生。第四种方法即是我们原来ant打包所使用的方法。
cs