#!/bin/bash -e
myRepo=$(pwd)
CMAKE_GENERATOR_OPTIONS=-G"Visual Studio 16 2019"
#CMAKE_GENERATOR_OPTIONS=-G"Visual Studio 15 2017 Win64"
#CMAKE_GENERATOR_OPTIONS=(-G"Visual Studio 16 2019" -A x64)  # CMake 3.14+ is required
if [  ! -d "$myRepo/opencv"  ]; then
    echo "cloning opencv"
    git clone https://github.com/opencv/opencv.git
else
    cd opencv
    git pull --rebase
    cd ..
fi
if [  ! -d "$myRepo/opencv_contrib"  ]; then
    echo "cloning opencv_contrib"
    git clone https://github.com/opencv/opencv_contrib.git
else
    cd opencv_contrib
    git pull --rebase
    cd ..
fi
RepoSource=opencv
mkdir -p build_opencv
pushd build_opencv
CMAKE_OPTIONS=(-DBUILD_PERF_TESTS:BOOL=OFF -DBUILD_TESTS:BOOL=OFF -DBUILD_DOCS:BOOL=OFF  -DWITH_CUDA:BOOL=OFF -DBUILD_EXAMPLES:BOOL=OFF -DINSTALL_CREATE_DISTRIB=ON)
set -x
cmake "${CMAKE_GENERATOR_OPTIONS[@]}" "${CMAKE_OPTIONS[@]}" -DOPENCV_EXTRA_MODULES_PATH="$myRepo"/opencv_contrib/modules -DCMAKE_INSTALL_PREFIX="$myRepo/install/$RepoSource" "$myRepo/$RepoSource"
echo "************************* $Source_DIR -->debug"
cmake --build .  --config debug
echo "************************* $Source_DIR -->release"
cmake --build .  --config release
cmake --build .  --target install --config release
cmake --build .  --target install --config debug
popd
In this script I suppose you use VS 2015 in 64 bits
CMAKE_GENERATOR_OPTIONS=-G"Visual Studio 14 2015 Win64"
and opencv will be installed in c:/lib/install/opencv
-DCMAKE_INSTALL_PREFIX="$myRepo/install/$RepoSource"
with no Perf tests, no tests, no doc, no CUDA and no example
CMAKE_OPTIONS=(-DBUILD_PERF_TESTS:BOOL=OFF -DBUILD_TESTS:BOOL=OFF -DBUILD_DOCS:BOOL=OFF -DBUILD_EXAMPLES:BOOL=OFF)
In git command line enter following command : ./installOCV.sh
Drink a coffee or two... opencv is ready : That's all!Next time you run this script, opencv and opencv_contrib will be updated and rebuild
----------- 引用结束 ---------------
1 解压好的文件如下:
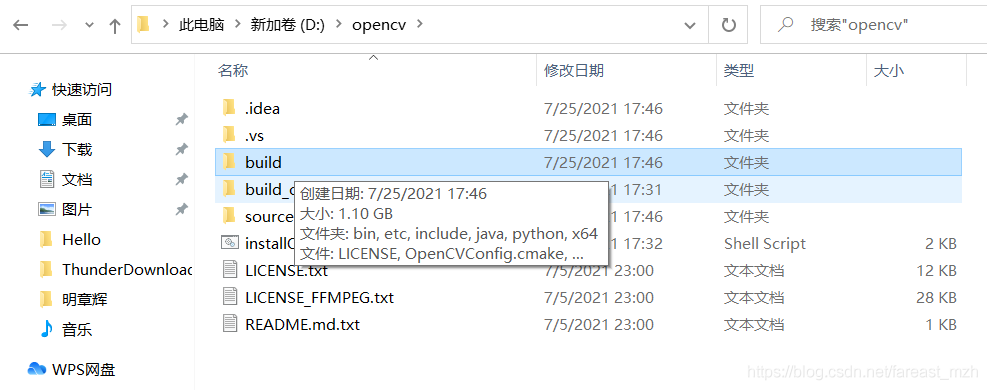
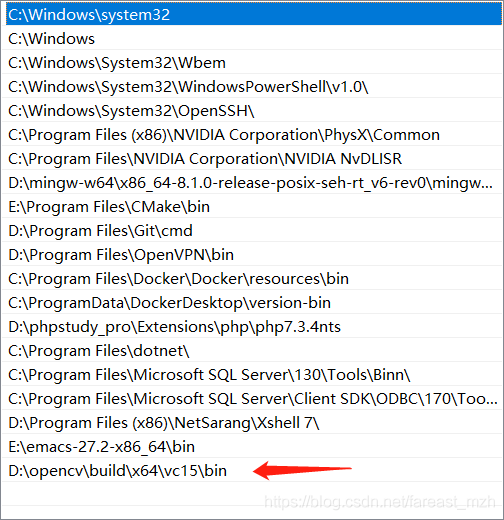
?2 配置path环境变量
64位操作系统对应x64, vs2019 对应版本vc15
?3. VS2019中的配置
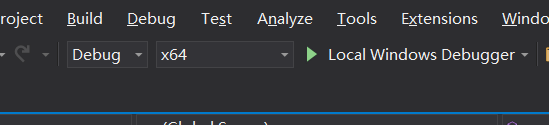
下面是Debug x64的配置,release x86/x64版需要再配置include, lib目录, 还有link位置
?(1)右键项目属性

?(2)VC++目录,平台选择X64,右侧包含目录和库目录
包含目录和库目录都是你之前OpenCV的安装路径,将下面两个路径添加进去
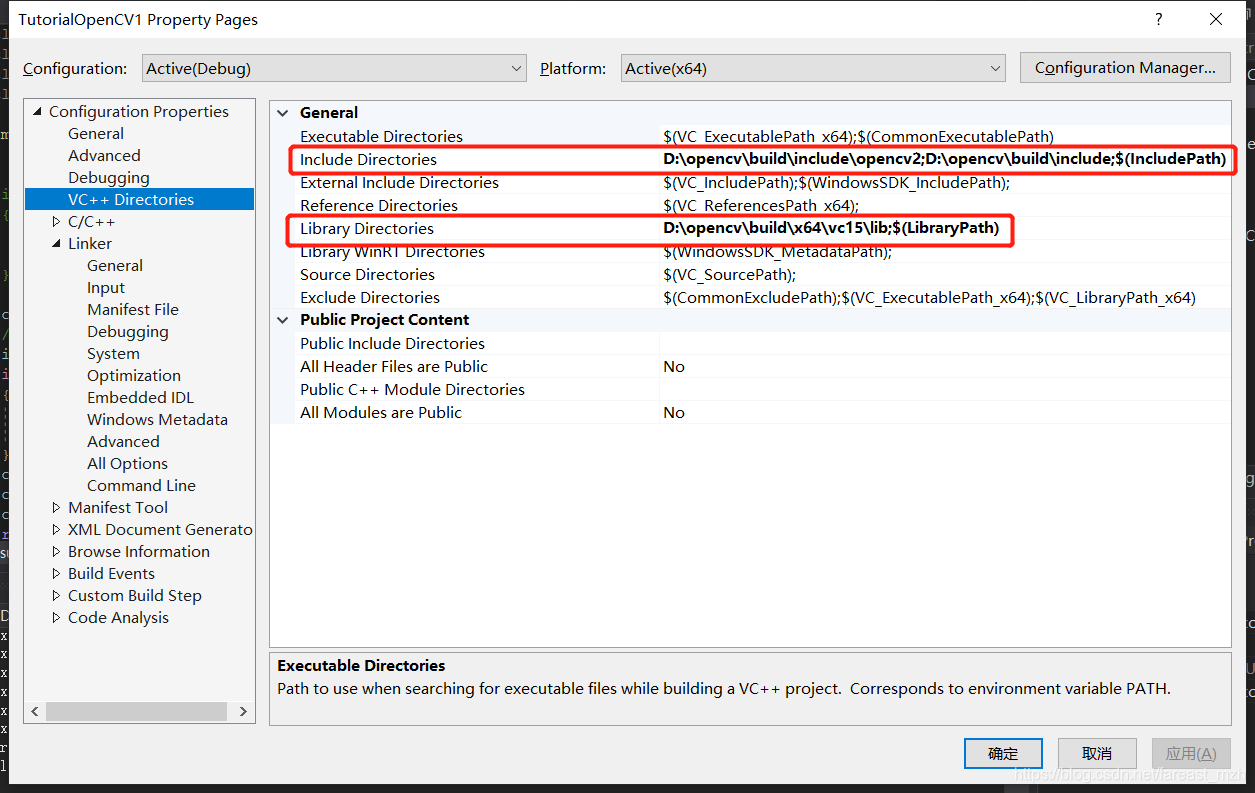
?D:\opencv\build\include\opencv2? 我试过了这个可以不加
D:\opencv\build\include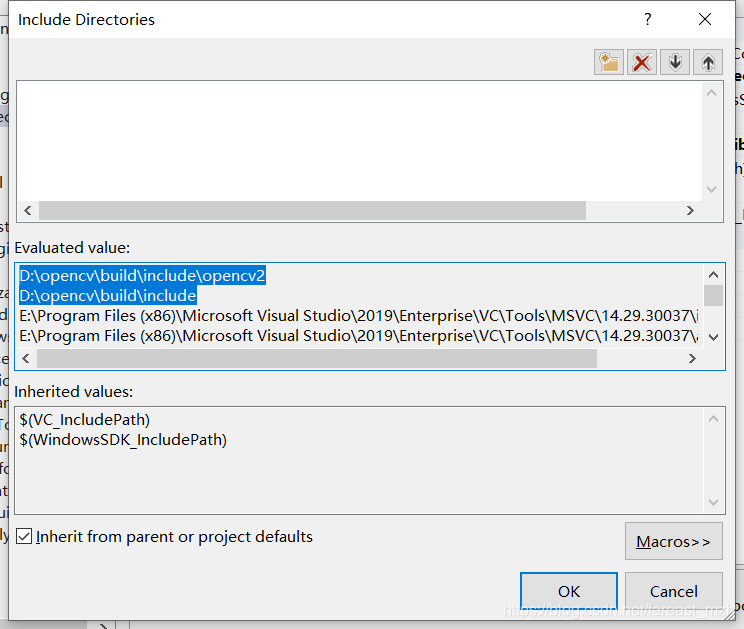
将下面的路径添加进去
?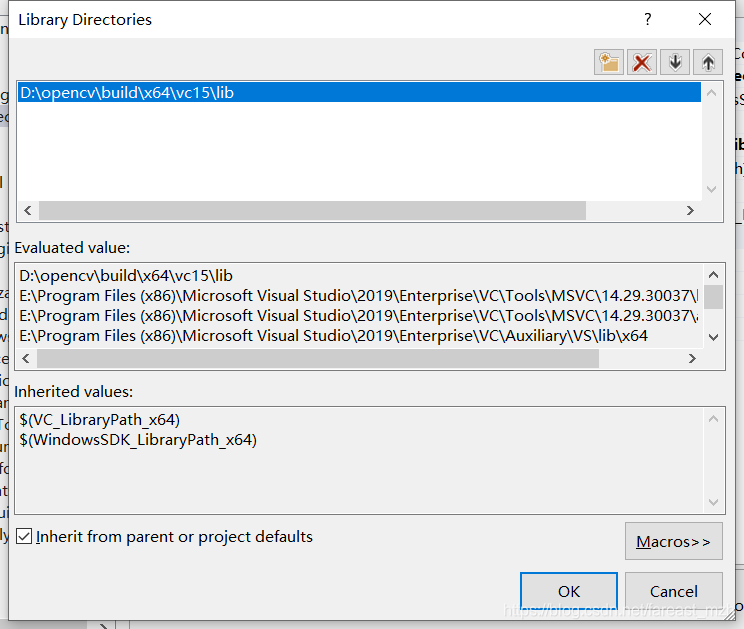 D:\opencv\build\x64\vc15\lib
(3)修改附加依赖项
将下面的.lib手动打上去,在D:\你的OpenCV安装目录\build\x64\vc15\lib中找
?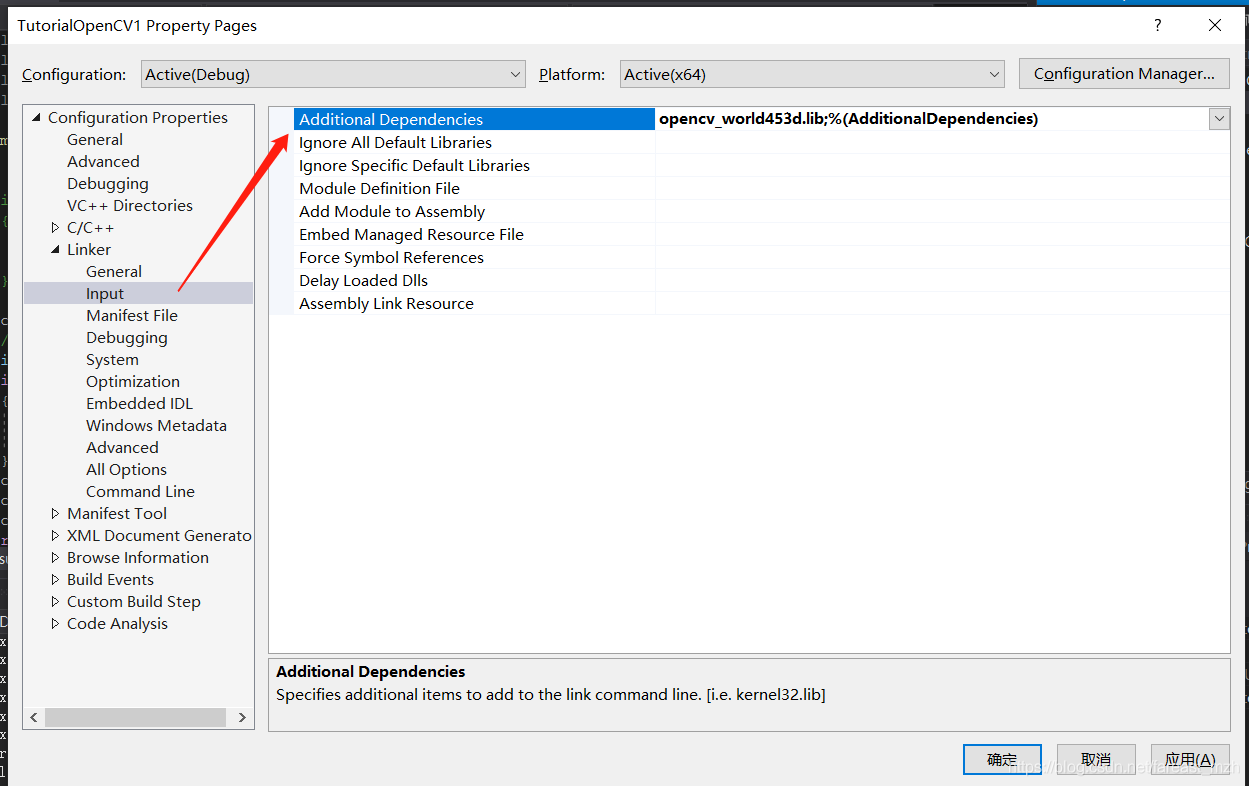
?Linker -> Input -> Aditional Dependencies
在安装路径下找到?D:\opencv\build\x64\vc15\lib
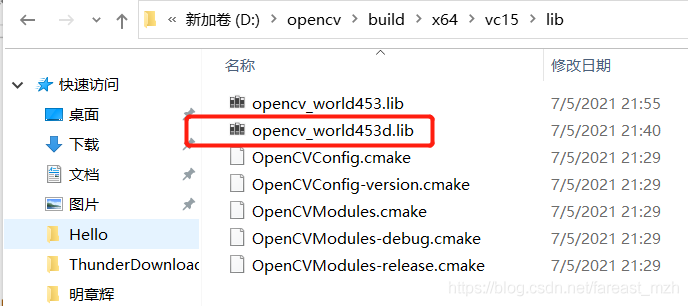
?所以这么配置, 453这个版本根据自己下载的版本实际情况填
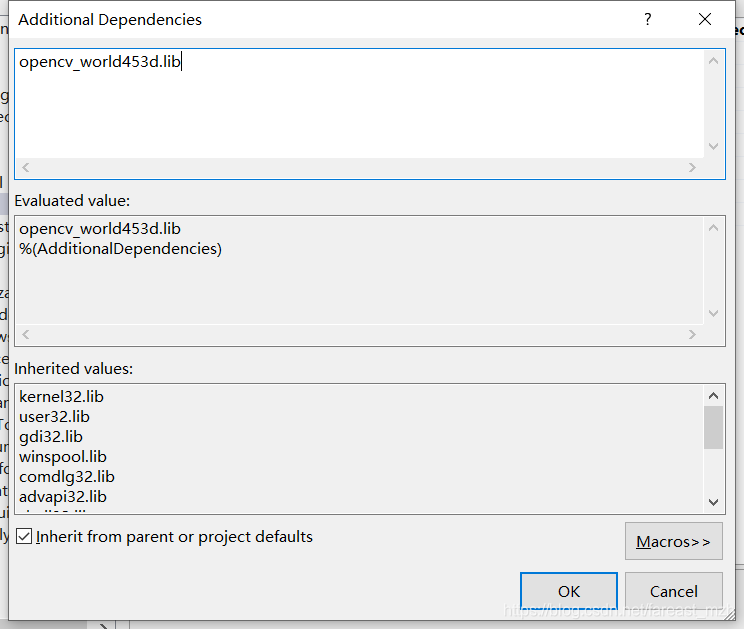
?额外的依赖.lib文件 后面的版本号在opencv bin路径下找 opencv_world453d.lib
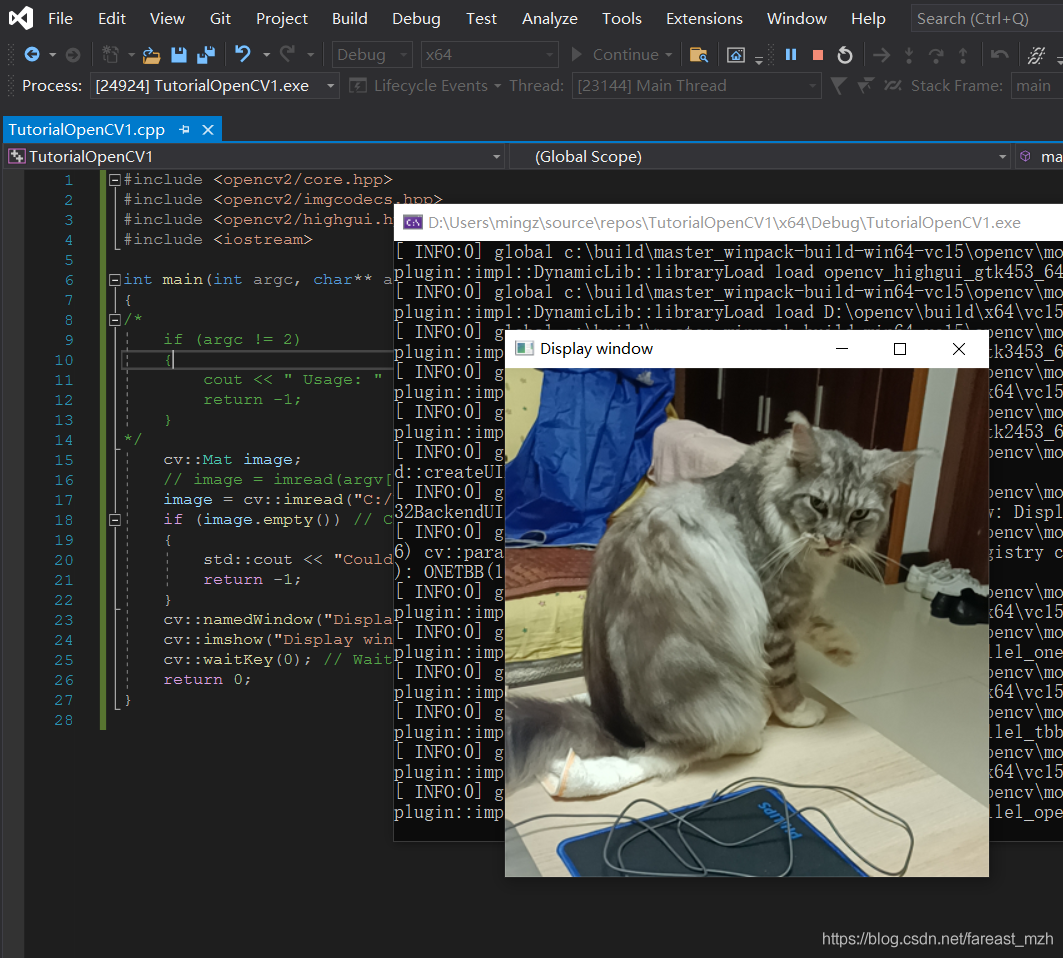
4. 测试
#include <opencv2/core.hpp>
#include <opencv2/imgcodecs.hpp>
#include <opencv2/highgui.hpp>
#include <iostream>

int main(int argc, char** argv)
{
/*
    if (argc != 2)
    {
        cout << " Usage: " << argv[0] << " ImageToLoadAndDisplay" << endl;
        return -1;
    }
*/
    cv::Mat image;
    // image = imread(argv[1], IMREAD_COLOR); // Read the file
    image = cv::imread("C:/Users/mingz/Pictures/Saved Pictures/cat.png", cv::IMREAD_COLOR);
    if (image.empty()) // Check for invalid input
    {
        std::cout << "Could not open or find the image" << std::endl;
        return -1;
    }
    cv::namedWindow("Display window", cv::WINDOW_AUTOSIZE); // Create a window for display.
    cv::imshow("Display window", image); // Show our image inside it.
    int k = cv::waitKey(0); // Wait for a keystroke in the window

    // save as ...
    if (k == 's') {
        cv::imwrite("cat2.png", image);
    }
    return 0;
}
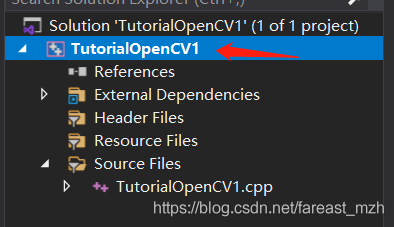
Solution Explorer中右键 项目名称
Rebuild
接下来看opencv的教程
https://docs.opencv.org/master/d9/df8/tutorial_root.html
在项目根目录下打开 [项目名]. vcxprj文件,看到刚才在菜单栏配置的编译依赖规则在xml配置文件里,作用类似Linux环境的Makefile。
 <PropertyGroup Condition="'$(Configuration)|$(Platform)'=='Debug|Win32'">
    <LinkIncremental>true</LinkIncremental>
    <ExecutablePath>
    </ExecutablePath>
    <IncludePath>D:\opencv\build\include;$(IncludePath)</IncludePath>
    <ReferencePath>$(ReferencePath)</ReferencePath>
    <LibraryPath>D:\opencv\build\x64\vc15\lib;$(LibraryPath)</LibraryPath>
  </PropertyGroup>
  <PropertyGroup Condition="'$(Configuration)|$(Platform)'=='Release|Win32'">
    <LinkIncremental>false</LinkIncremental>
  </PropertyGroup>
  <PropertyGroup Condition="'$(Configuration)|$(Platform)'=='Debug|x64'">
    <LinkIncremental>true</LinkIncremental>
    <IncludePath>D:\opencv\build\include\opencv2;D:\opencv\build\include;$(IncludePath)</IncludePath>
    <LibraryPath>D:\opencv\build\x64\vc15\lib;$(LibraryPath)</LibraryPath>
  </PropertyGroup>

<!-- ... -->
  <ItemDefinitionGroup Condition="'$(Configuration)|$(Platform)'=='Debug|Win32'">
    <ClCompile>
      <WarningLevel>Level3</WarningLevel>
      <SDLCheck>true</SDLCheck>
      <PreprocessorDefinitions>WIN32;_DEBUG;_CONSOLE;%(PreprocessorDefinitions)</PreprocessorDefinitions>
      <ConformanceMode>true</ConformanceMode>
    </ClCompile>
    <Link>
      <SubSystem>Console</SubSystem>
      <GenerateDebugInformation>true</GenerateDebugInformation>
      <AdditionalDependencies>opencv_world453d.lib;%(AdditionalDependencies)</AdditionalDependencies>
    </Link>
  </ItemDefinitionGroup>
微软的软件中xml文件都不用手动改,项目中的xml文件都有图形界面配置,用工具软件生成xml配置文件。
Clion IDE配置比Visual Studio简单,但是调试工具没有Visual Studio强
cs