Spring Cloud Netflix简介:Spring Cloud Netflix是对Netflix OSS组件的集成,主要模块包括服务治理Eureka,断路器Hystrix,客户端负载均衡Ribbon,声明式REST客户端Feign,路由网关Zuul等。
Spring Cloud Eureka简介:Spring Cloud Eureka是Spring Cloud Netflix子项目的核心组件之一,它实现了服务治理的功能。Spring Cloud Eureka提供服务端与客户端,服务端即是Eureka服务注册中心,客户端完成微服务向Eureka服务的注册与发现。
在通过Spring Cloud Eureka实现服务治理之前,需要确定SpringCloud与SpringBoot的版本对应关系,从SpringCloud官网截取的SpringCloud与SpringBoot的版本对应关系如下:
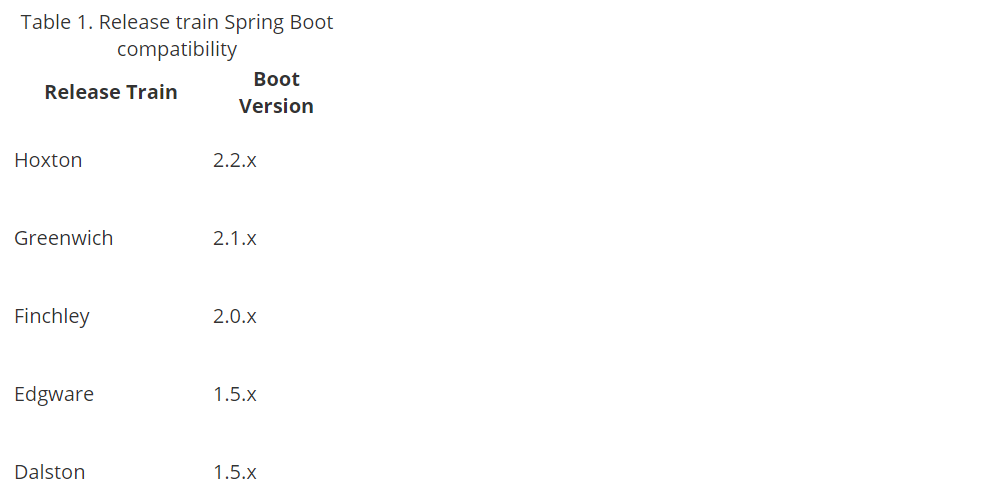
下面通过Spring Cloud Eureka实现服务治理,其中SpringBoot使用的2.2.2.RELEASE版本,SpringCloud使用的Hoxton.SR1版本。
一、创建Eureka注册中心
通过Maven新建一个名为spring-cloud-netflix-eureka-server的项目。
1.编写pom文件
<?xml version="1.0" encoding="UTF-8"?>
<project xmlns="http://maven.apache.org/POM/4.0.0"
xmlns:xsi="http://www.w3.org/2001/XMLSchema-instance"
xsi:schemaLocation="http://maven.apache.org/POM/4.0.0 http://maven.apache.org/xsd/maven-4.0.0.xsd">
<modelVersion>4.0.0</modelVersion>
<groupId>com.rtxtitanv</groupId>
<artifactId>spring-cloud-netflix-eureka-server</artifactId>
<version>1.0.0</version>
<packaging>jar</packaging>
<name>spring-cloud-netflix-eureka-server</name>
<description>eureka server</description>
<parent>
<groupId>org.springframework.boot</groupId>
<artifactId>spring-boot-starter-parent</artifactId>
<version>2.2.2.RELEASE</version>
<relativePath/>
</parent>
<properties>
<project.build.sourceEncoding>UTF-8</project.build.sourceEncoding>
<project.reporting.outputEncoding>UTF-8</project.reporting.outputEncoding>
<java.version>1.8</java.version>
<spring-cloud.version>Hoxton.SR1</spring-cloud.version>
</properties>
<dependencyManagement>
<dependencies>
<dependency>
<groupId>org.springframework.cloud</groupId>
<artifactId>spring-cloud-dependencies</artifactId>
<version>${spring-cloud.version}</version>
<type>pom</type>
<scope>import</scope>
</dependency>
</dependencies>
</dependencyManagement>
<dependencies>
<dependency>
<groupId>org.springframework.cloud</groupId>
<artifactId>spring-cloud-starter-netflix-eureka-server</artifactId>
</dependency>
<dependency>
<groupId>org.springframework.boot</groupId>
<artifactId>spring-boot-starter-security</artifactId>
</dependency>
</dependencies>
<build>
<plugins>
<plugin>
<groupId>org.springframework.boot</groupId>
<artifactId>spring-boot-maven-plugin</artifactId>
</plugin>
</plugins>
</build>
</project>
2.主启动类
package com.rtxtitanv;
import org.springframework.boot.SpringApplication;
import org.springframework.boot.autoconfigure.SpringBootApplication;
import org.springframework.cloud.netflix.eureka.server.EnableEurekaServer;
@EnableEurekaServer
@SpringBootApplication
public class EurekaServerApplication {
public static void main(String[] args) {
SpringApplication.run(EurekaServerApplication.class, args);
}
}
@EnableEurekaServer:表示启动Eureka注册中心。
3.编写配置文件
在application.yml中进行如下配置:
server:
port: ${PORT:8080}
spring:
application:
name: eureka-server
security:
user:
name: rtxtitanv
password: rtxtitanv
eureka:
instance:
hostname: ${EUREKA_HOSTNAME:localhost}
instance-id: ${spring.application.name}:${spring.cloud.client.ip-address}:${server.port}
lease-renewal-interval-in-seconds: 20
lease-expiration-duration-in-seconds: 60
server:
enable-self-preservation: false
eviction-interval-timer-in-ms: 60000
client:
register-with-eureka: false
fetch-registry: false
healthcheck:
enabled: true
service-url:
defaultZone: ${EUREKA_SERVER:http://rtxtitanv:rtxtitanv@${eureka.instance.hostname}:${server.port}/eureka/}
4.关闭SpringSecurity的CSRF检验
由于这里引入了SpringSecurity来给Eureka注册中心添加认证,默认情况下SpringSecurity启用了CSRF检验,需要手动关闭CSRF检验,代码如下:
package com.rtxtitanv.config;
import org.springframework.security.config.annotation.web.builders.HttpSecurity;
import org.springframework.security.config.annotation.web.configuration.EnableWebSecurity;
import org.springframework.security.config.annotation.web.configuration.WebSecurityConfigurerAdapter;
@EnableWebSecurity
public class CsrfSecurityConfig extends WebSecurityConfigurerAdapter {
@Override
protected void configure(HttpSecurity http) throws Exception {
http.csrf().disable();
super.configure(http);
}
}
5.启动注册中心
(1)单节点Eureka服务
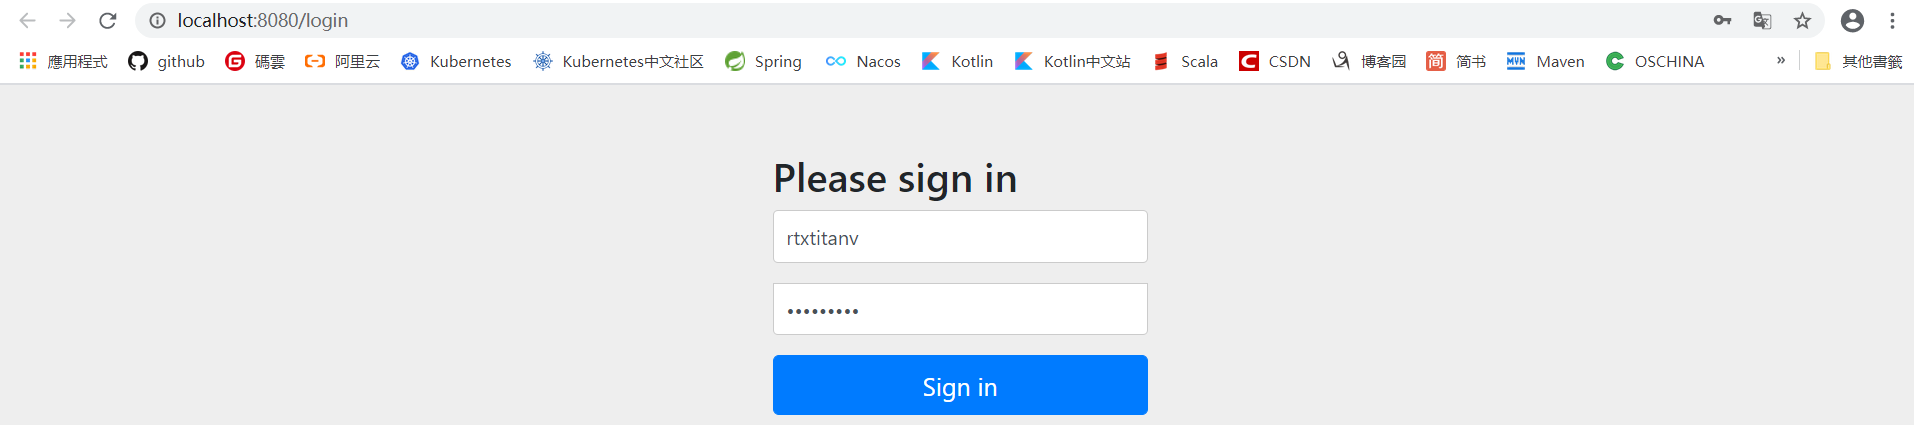
启动eureka-server,访问http://localhost:8080,结果见下图,由于Eureka注册中心添加了认证,需要输入用户名和密码。
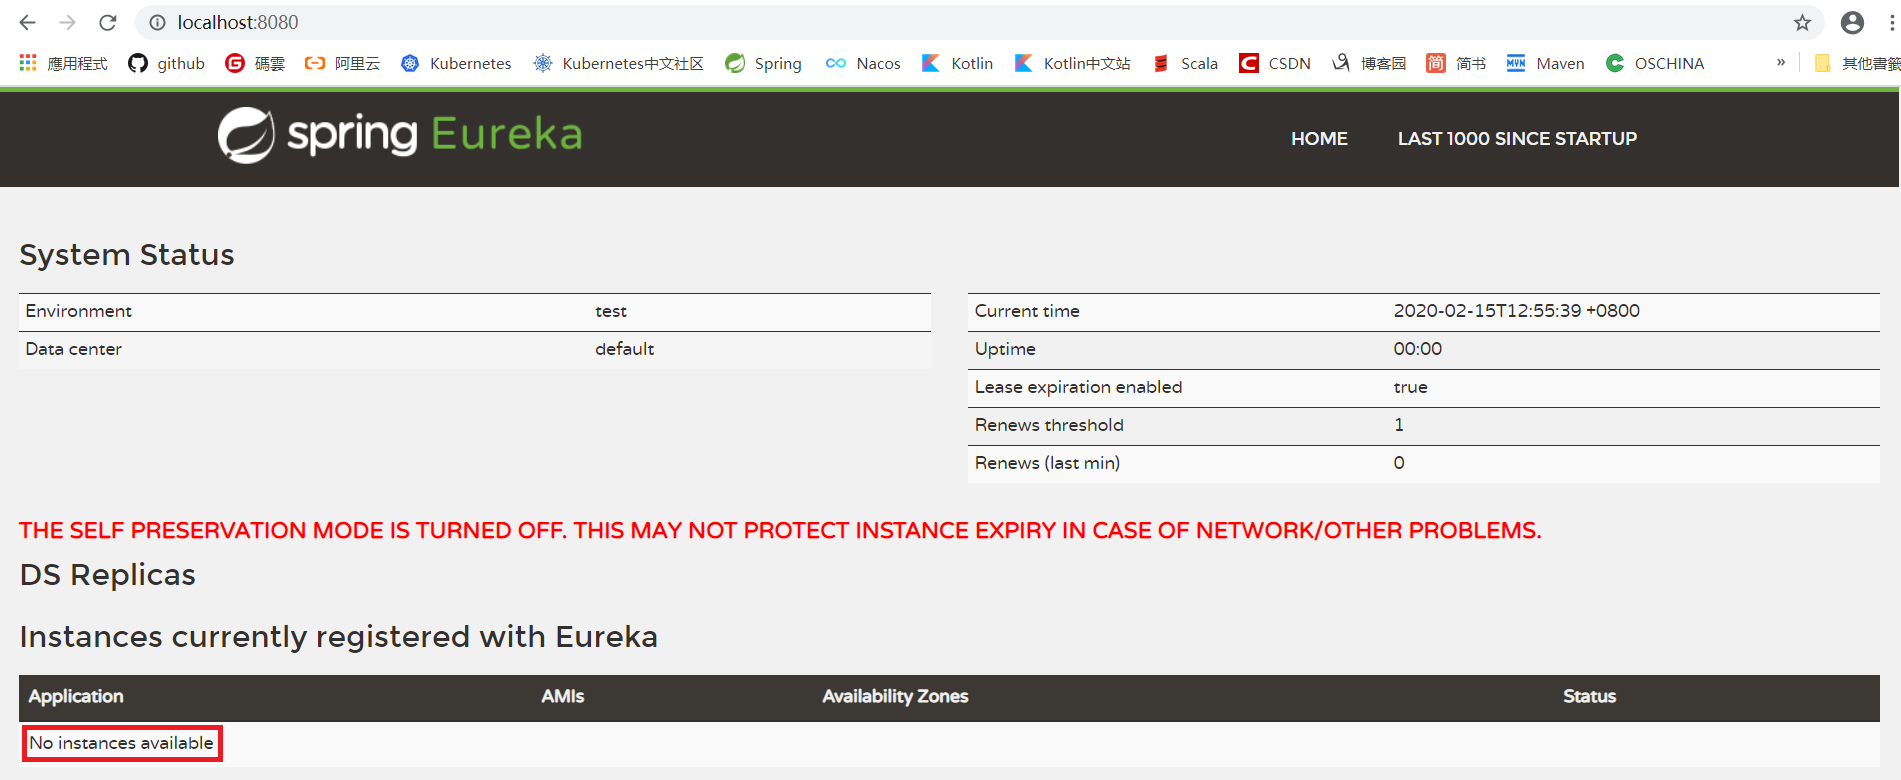
登录认证后访问结果见下图,进入了注册中心界面,说明单节点Eureka注册中心启动成功,此时还没有任何服务注册到Eureka注册中心。
(2)Eureka服务集群
以3个节点为例,这里启动3个Eureka注册中心节点,互相向对方节点注册,首先修改如下配置:
eureka:
client:
register-with-eureka: true
fetch-registry: true
然后在主机hosts文件中添加如下域名信息:
127.0.0.1 eureka-server-01
127.0.0.1 eureka-server-02
127.0.0.1 eureka-server-03
然后在IDEA中创建启动脚本EurekaServer01、EurekaServer02、EurekaServer03
EurekaServer01:
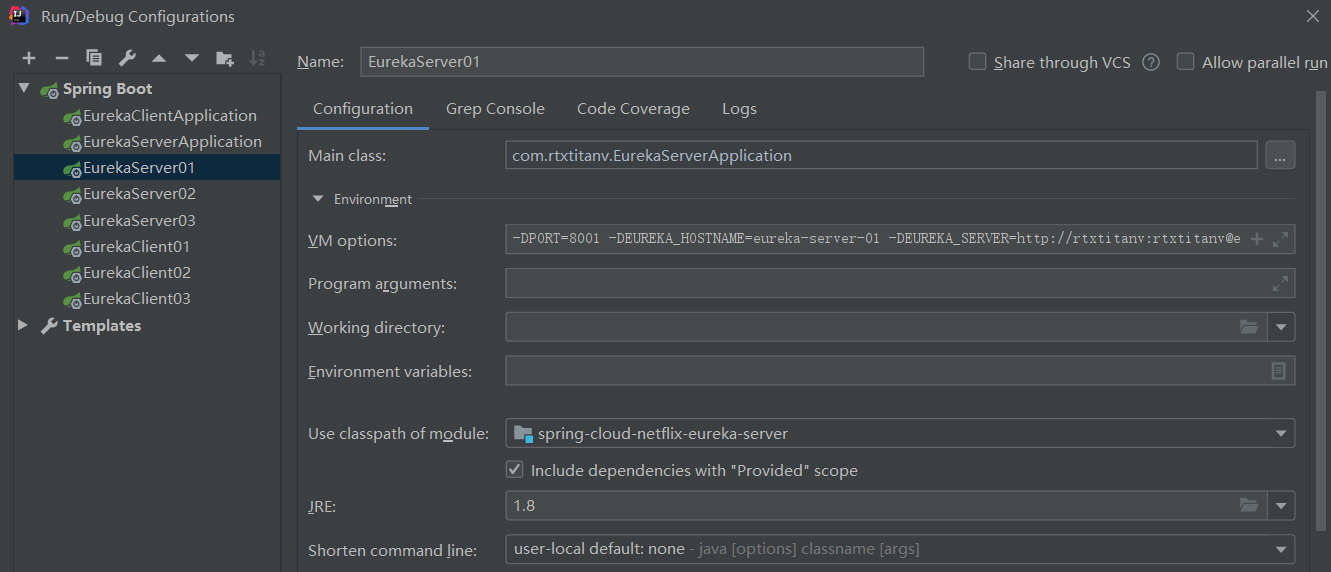
VM options:
-DPORT=8001
-DEUREKA_HOSTNAME=eureka-server-01
-DEUREKA_SERVER=http://rtxtitanv:rtxtitanv@eureka-server-02:8002/eureka/,http://rtxtitanv:rtxtitanv@eureka-server-03:8003/eureka/
EurekaServer02:
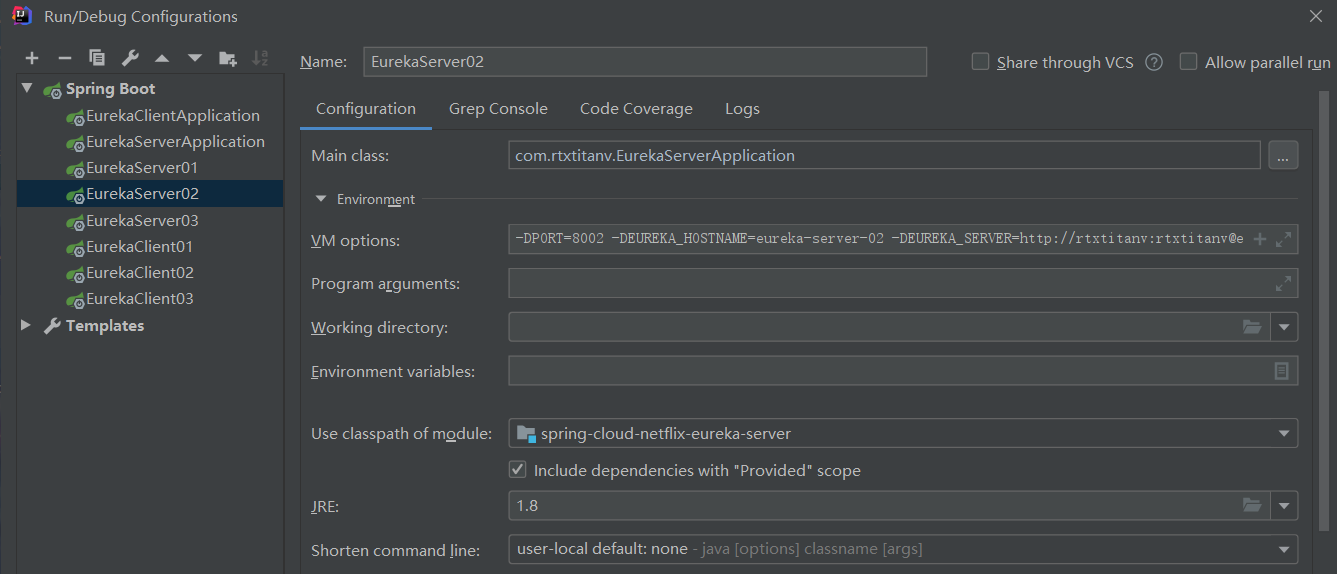
VM options:
-DPORT=8002
-DEUREKA_HOSTNAME=eureka-server-02
-DEUREKA_SERVER=http://rtxtitanv:rtxtitanv@eureka-server-01:8001/eureka/,http://rtxtitanv:rtxtitanv@eureka-server-03:8003/eureka/
EurekaServer03:
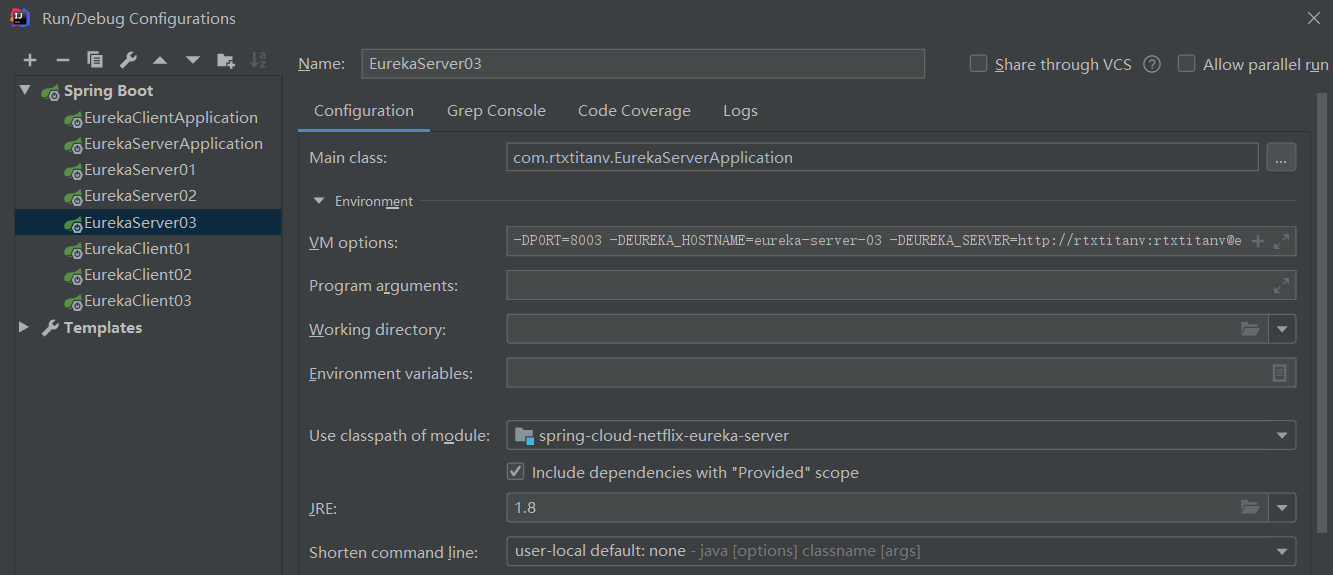
VM options:
-DPORT=8003
-DEUREKA_HOSTNAME=eureka-server-03
-DEUREKA_SERVER=http://rtxtitanv:rtxtitanv@eureka-server-01:8001/eureka/,http://rtxtitanv:rtxtitanv@eureka-server-02:8002/eureka/
然后分别启动三个服务,启动后控制台会输出相关日志,UP表示启动成功状态:
2020-02-15 13:41:58.358  INFO 9456 --- [      Thread-27] c.n.e.registry.AbstractInstanceRegistry  : Registered instance EUREKA-SERVER/eureka-server:10.0.0.11:8003 with status UP (replication=true)
2020-02-15 13:41:58.359  INFO 9456 --- [      Thread-27] c.n.e.registry.AbstractInstanceRegistry  : Registered instance EUREKA-SERVER/eureka-server:10.0.0.11:8002 with status UP (replication=true)
2020-02-15 13:41:58.359  INFO 9456 --- [      Thread-27] c.n.e.registry.AbstractInstanceRegistry  : Registered instance EUREKA-SERVER/eureka-server:10.0.0.11:8001 with status UP (replication=true)
2020-02-15 13:41:58.359  INFO 9456 --- [      Thread-27] c.n.e.r.PeerAwareInstanceRegistryImpl    : Got 3 instances from neighboring DS node