Spring Cloud Bus简介:Spring Cloud Bus即消息总线通过一个轻量级的消息中间件可以连接分布式系统中的各个节点。可以使用该总线来广播某些状态比如配置信息的改变或其他管理指令。AMQP和Kafka实现包含在其中。或者,在类路径上找到的任何Spring Cloud Stream绑定器都可以作为一个现成的传输工具。
本文主要对Spring Cloud Bus的基本使用进行简单总结,其中SpringBoot使用的2.2.2.RELEASE版本,SpringCloud使用的Hoxton.SR1版本。这里将沿用SpringCloud 服务注册与发现Eureka Hoxton版本的eureka-server作为注册中心,并将SpringCloud 分布式配置中心Config Hoxton版本的config-server和config-client的内容复制到新建项目里面,在此基础上添加消息总线实现动态刷新配置。
一、Bus结合RabbitMQ动态刷新配置
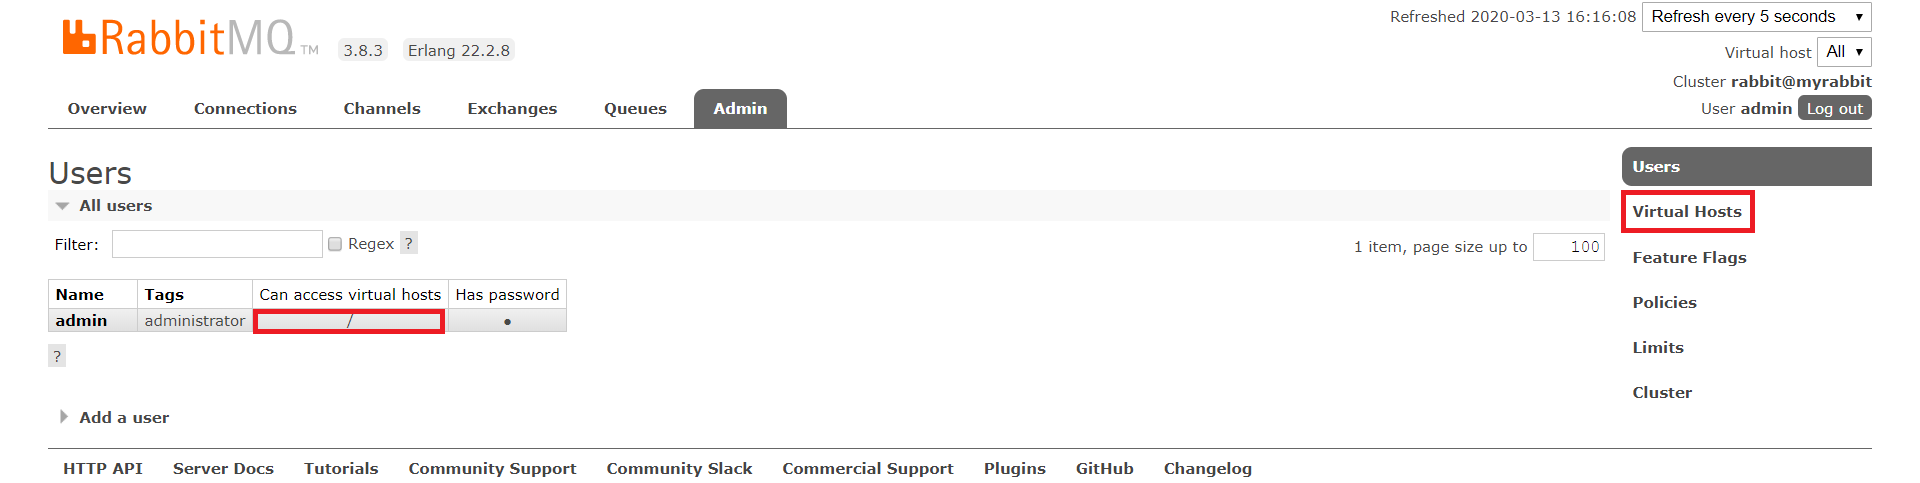
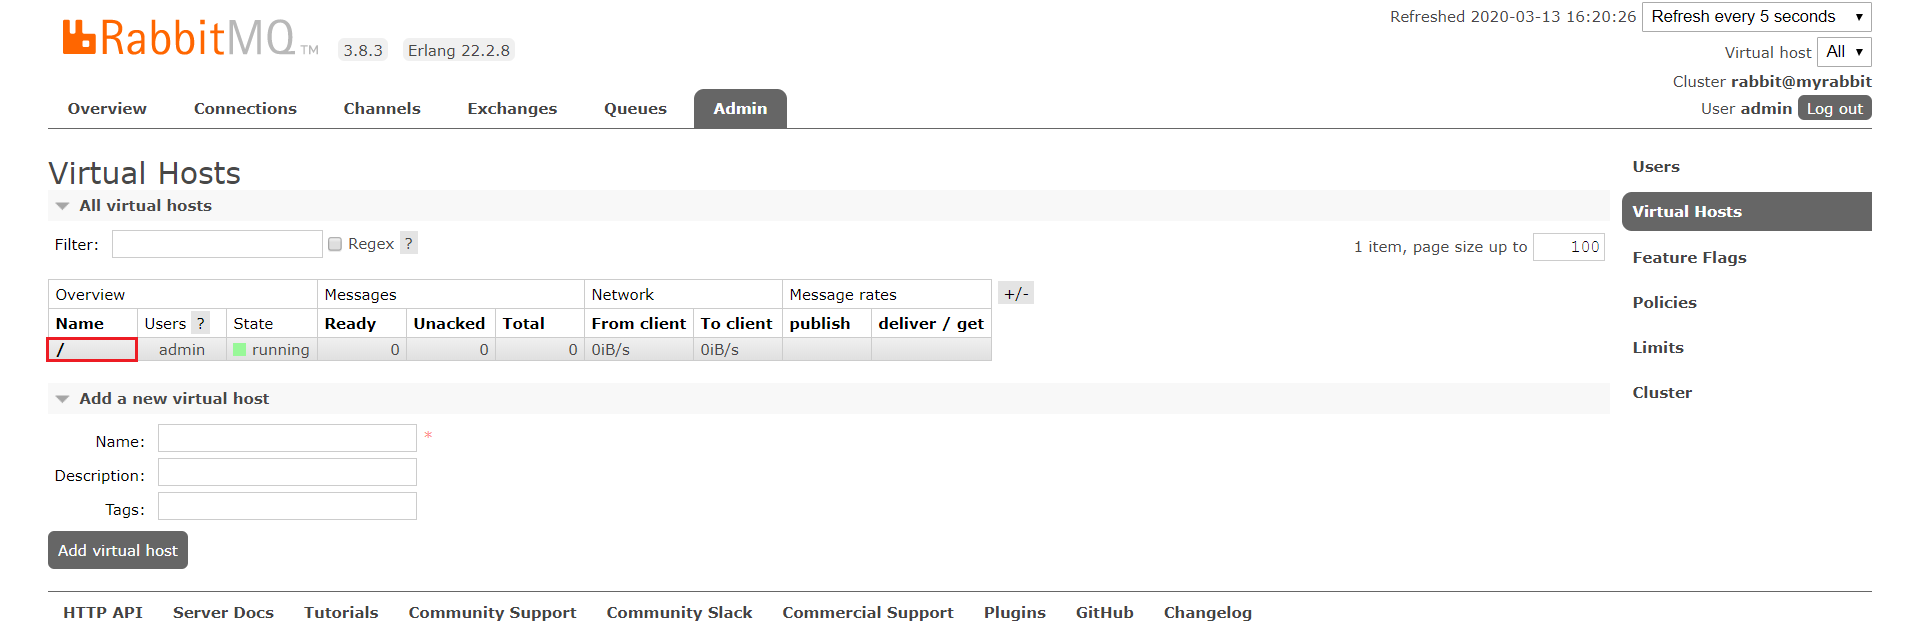
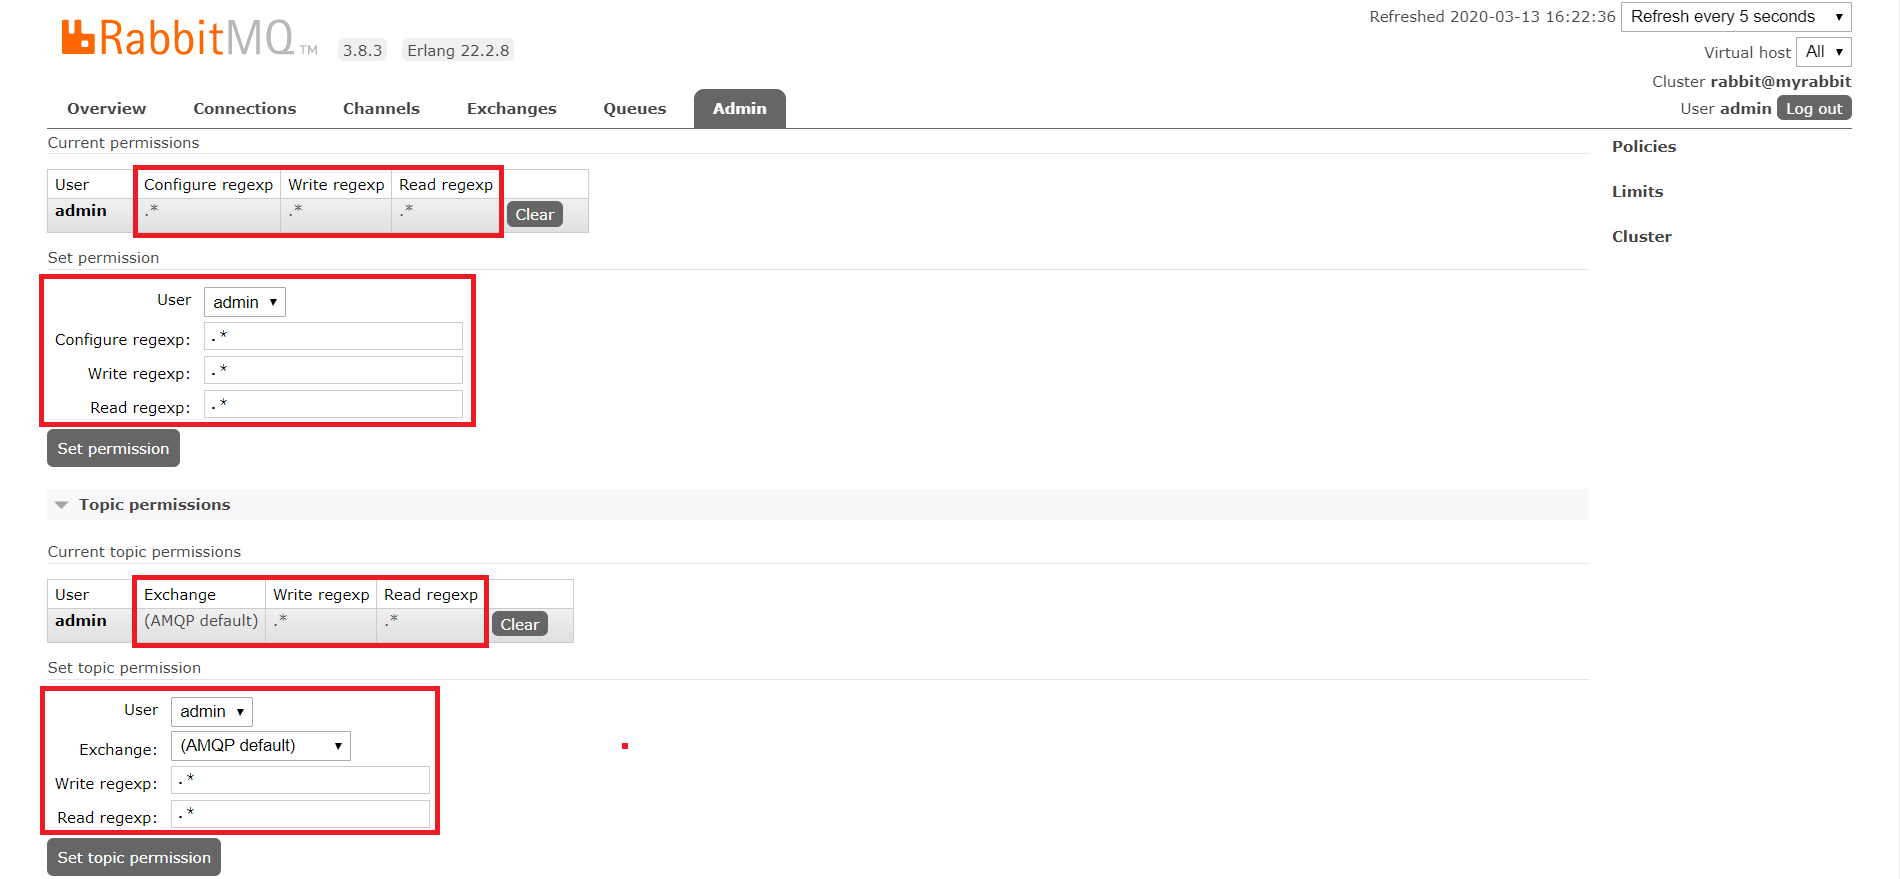
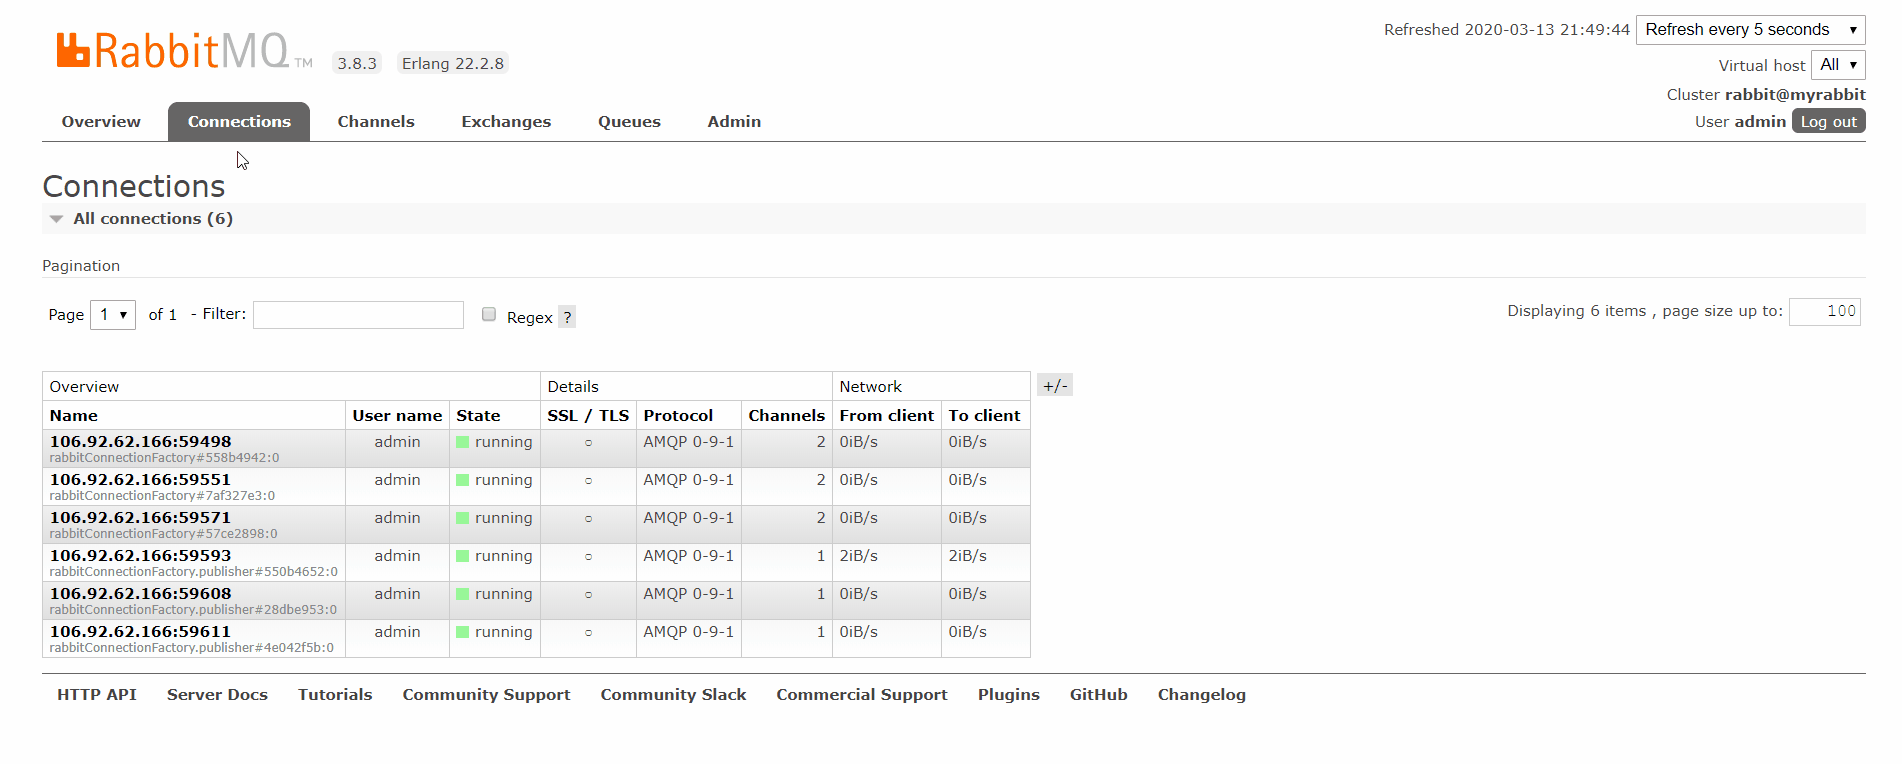
RabbitMQ的安装这里就不总结了,笔者这里使用的RabbitMQ容器,不清楚的可以先参考Docker常见应用部署中的RabbitMQ部署。
1.Config服务端添加Bus支持
通过Maven新建一个名为spring-cloud-bus-server的项目,并将config-server的内容复制进来,在此基本上进行改造。
(1)引入依赖
还需引入以下依赖:
<dependency>
<groupId>org.springframework.cloud</groupId>
<artifactId>spring-cloud-starter-bus-amqp</artifactId>
</dependency>
<dependency>
<groupId>org.springframework.boot</groupId>
<artifactId>spring-boot-starter-actuator</artifactId>
</dependency>
(2)编写配置文件
在application.yml中进行如下配置:
server:
port: ${PORT:9600}
spring:
application:
name: bus-server
security:
user:
name: rtxtitanv
password: rtxtitanv
cloud:
config:
server:
git:
uri: https://github.com/RtxTitanV/springcloud-config-repository.git
username: rtxtitanv
password: .*********.
clone-on-start: true
force-pull: true
basedir: E:\software\DevelopmentTool\IntelliJ IDEA Space\my_project\springcloud-config-repository\localrep
rabbitmq:
host: 这里可以填自己的rabbitmq服务器ip
port: 5672
username: admin
password: admin
eureka:
client:
register-with-eureka: true
fetch-registry: true
service-url:
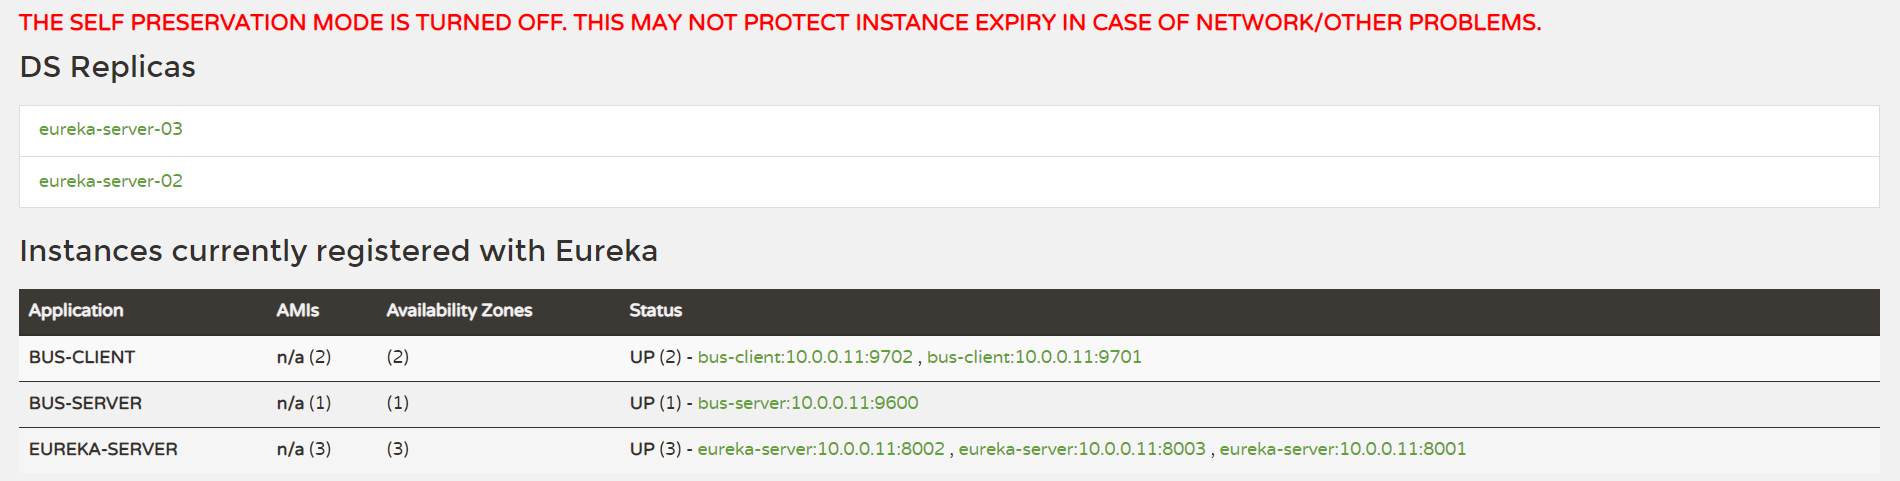
defaultZone: http://rtxtitanv:rtxtitanv@eureka-server-01:8001/eureka/,http://rtxtitanv:rtxtitanv@eureka-server-02:8002/eureka/,http://rtxtitanv:rtxtitanv@eureka-server-03:8003/eureka/
instance:
prefer-ip-address: true
instance-id: ${spring.application.name}:${spring.cloud.client.ip-address}:${server.port}
lease-renewal-interval-in-seconds: 20
lease-expiration-duration-in-seconds: 60
management:
endpoints:
web:
exposure:
include: 'bus-refresh'
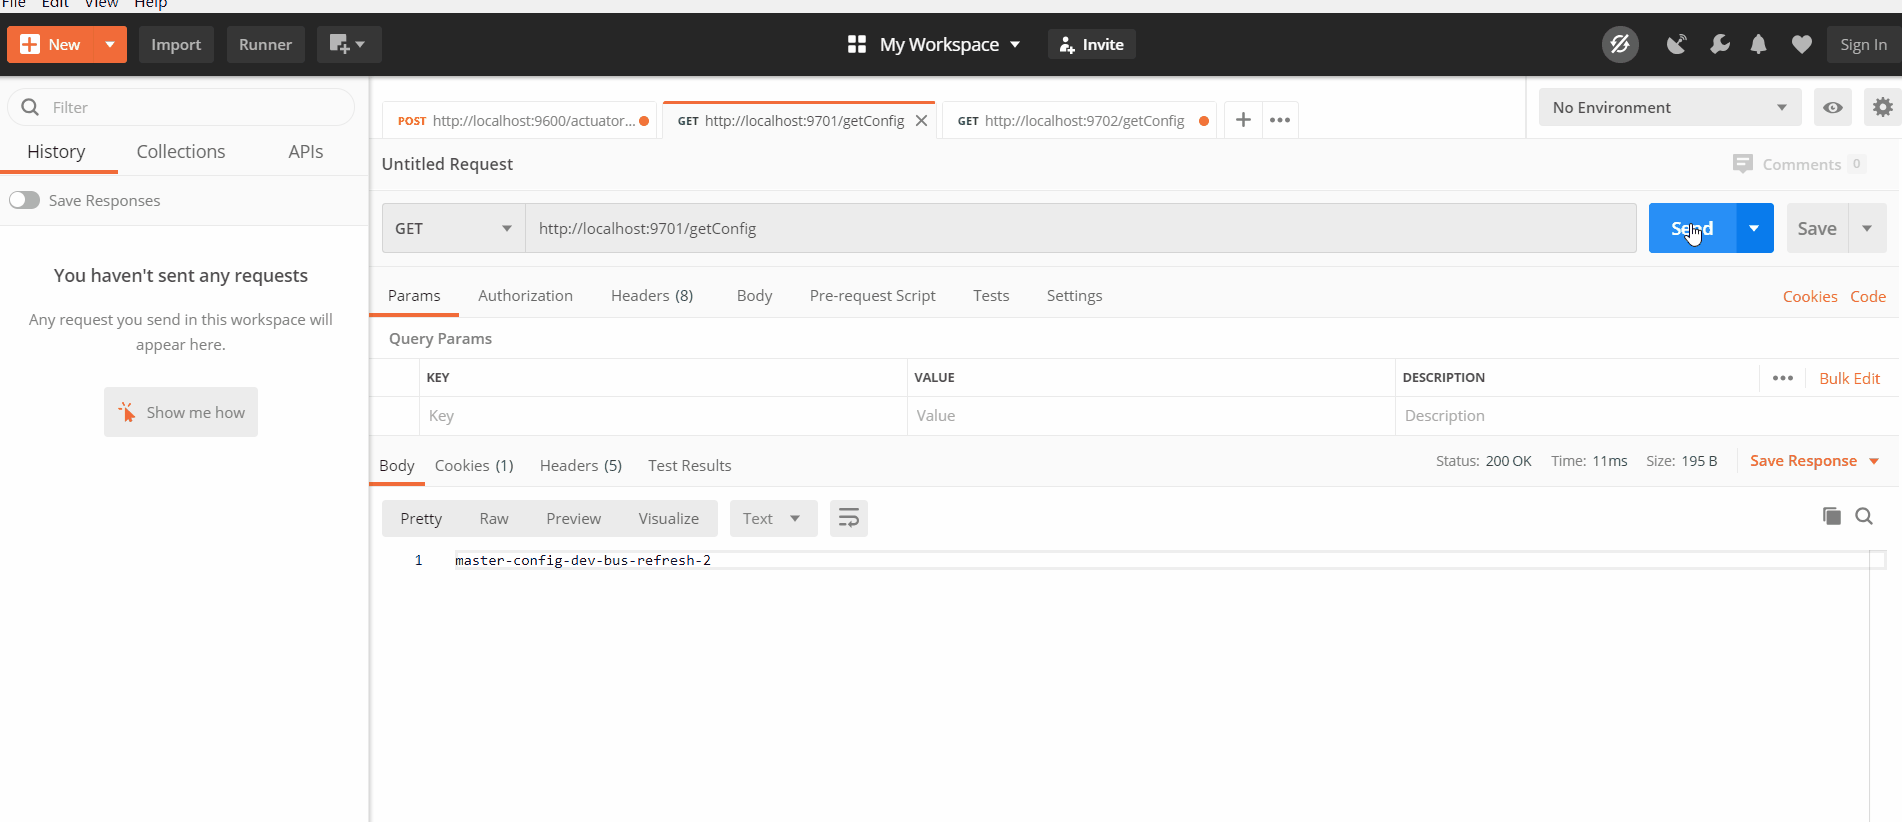
2.Config客户端添加Bus支持
通过Maven新建一个名为spring-cloud-bus-client的项目,并将config-client的内容复制进来,在此基本上进行改造。
(1)引入依赖
还需引入以下依赖:
<dependency>
<groupId>org.springframework.cloud</groupId>
<artifactId>spring-cloud-starter-bus-amqp</artifactId>
</dependency>
(2)编写配置文件
在bootstrap.yml里进行如下配置: