ZooKeeper之以复制模式(replicated mode)运行(Windows环境)
以独立模式运行ZooKeeper,便于评估,开发和测试。但在生产中,您应该以复制模式运行ZooKeeper。同一应用程序中的复制服务器组称为仲裁,而在复制模式下,
仲裁中的所有服务器都具有相同配置文件的副本。
值得注意的一点是,对于复制模式,至少需要3台服务器,(强烈建议使用奇数个服务器,如果您只有两台服务器,那么您处于这样的情况:如果其中一台服务器出现故障,则没有足够的机器来形成大多数法定人数。两台服务器本质上是 少 比单台服务器的稳定,因为有两个故障单点)
下面提供两种方式进行复制模式的启动
1.只用一份zookeeper文件,里边配置三份不同的zoo.cfg以及与之对应的三份server启动脚本,具体步骤如下:
1.1 ?配置三份不同的zoo.cfg,如下图所示,注意文件内容中的dataDir属性配置是不同的(dataLogDir:若没提供的话则用dataDir。zookeeper的持久化都存储在这两个目录里。dataLogDir里是放到的顺序日志(WAL)。而dataDir里放的是内存数据结构的snapshot,便于快速恢复。为了达到性能最大化,一般建议把dataDir和dataLogDir分到不同的磁盘上,以充分利用磁盘顺序写的特性。)
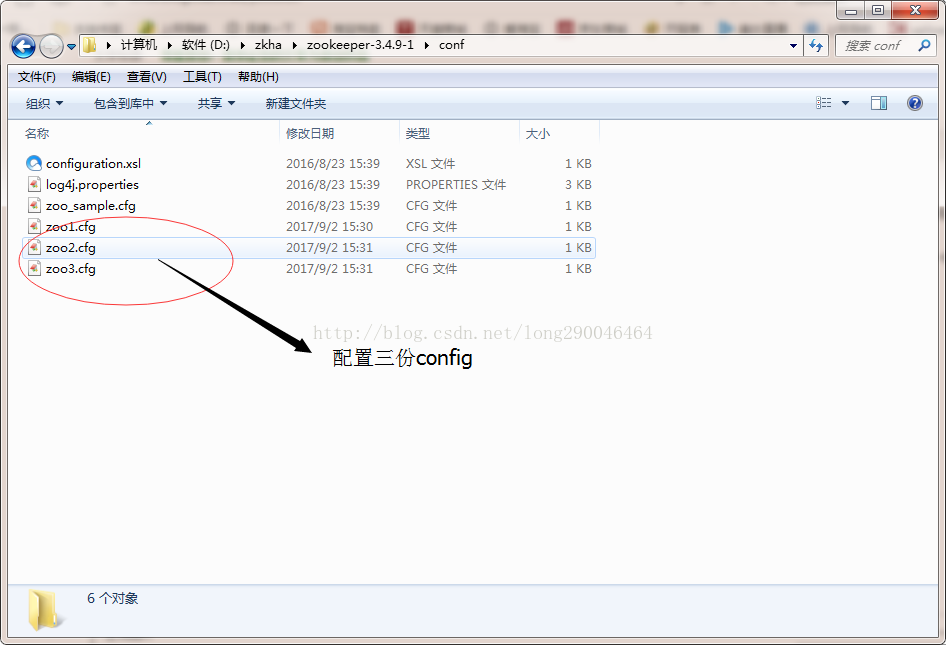
具体配置内容如下:
zoo1.cfg:
# The number of milliseconds of each tick
tickTime=2000
# The number of ticks that the initial
# synchronization phase can take
initLimit=10
# The number of ticks that can pass between
# sending a request and getting an acknowledgement
syncLimit=5
# the directory where the snapshot is stored.
# do not use /tmp for storage, /tmp here is just
# example sakes.
dataDir=/zkha/zookeeper-1
# the port at which the clients will connect
clientPort=2181
# the maximum number of client connections.
# increase this if you need to handle more clients
#maxClientCnxns=60
#
# Be sure to read the maintenance section of the
# administrator guide before turning on autopurge.
#
# http://zookeeper.apache.org/doc/current/zookeeperAdmin.html#sc_maintenance
#
# The number of snapshots to retain in dataDir
#autopurge.snapRetainCount=3
# Purge task interval in hours
# Set to "0" to disable auto purge feature
#autopurge.purgeInterval=1

server.1 = 127.0.0.1:2888:3888
server.2 = 127.0.0.1:2889:3889
server.3 = 127.0.0.1:2890:3890
zoo2.cfg:
# The number of milliseconds of each tick
tickTime=2000
# The number of ticks that the initial
# synchronization phase can take
initLimit=10
# The number of ticks that can pass between
# sending a request and getting an acknowledgement
syncLimit=5
# the directory where the snapshot is stored.
# do not use /tmp for storage, /tmp here is just
# example sakes.
dataDir=/zkha/zookeeper-2
# the port at which the clients will connect
clientPort=2182
# the maximum number of client connections.
# increase this if you need to handle more clients
#maxClientCnxns=60
#
# Be sure to read the maintenance section of the
# administrator guide before turning on autopurge.
#
# http://zookeeper.apache.org/doc/current/zookeeperAdmin.html#sc_maintenance
#
# The number of snapshots to retain in dataDir
#autopurge.snapRetainCount=3
# Purge task interval in hours
# Set to "0" to disable auto purge feature
#autopurge.purgeInterval=1

server.1 = localhost:2888:3888
server.2 = localhost:2889:3889
server.3 = localhost:2890:3890
zoo3.cfg:
# The number of milliseconds of each tick
tickTime=2000
# The number of ticks that the initial
# synchronization phase can take
initLimit=10
# The number of ticks that can pass between
# sending a request and getting an acknowledgement
syncLimit=5
# the directory where the snapshot is stored.
# do not use /tmp for storage, /tmp here is just
# example sakes.
dataDir=/zkha/zookeeper-3
# the port at which the clients will connect
clientPort=2183
# the maximum number of client connections.
# increase this if you need to handle more clients
#maxClientCnxns=60
#
# Be sure to read the maintenance section of the
# administrator guide before turning on autopurge.
#
# http://zookeeper.apache.org/doc/current/zookeeperAdmin.html#sc_maintenance
#
# The number of snapshots to retain in dataDir
#autopurge.snapRetainCount=3
# Purge task interval in hours
# Set to "0" to disable auto purge feature
#autopurge.purgeInterval=1

server.1 = localhost:2888:3888
server.2 = localhost:2889:3889
server.3 = localhost:2890:3890
配置内容说明:
tickTime、clientPort、dataDir这三个属性在独立模式那篇文章里边已经说过了,下面说说其他属性
initLimit是超时ZooKeeper用于限制ZooKeeper服务器在slave中连接到leader的时间长度(启动初始化)。如:tickTime=2000,initLimit=5,则时间长度为5*2000(单位毫秒),即10秒。
syncLimit:配置 Leader 与 Follower 之间发送消息,请求和应答时间长度,最长不能超过多少个 tickTime 的时间长度,总的时间长度就是 syncLimit * tickTime 毫秒?
表单server.X的条目列出构成ZooKeeper服务的服务器。当服务器启动时,它通过查找数据目录(dataDir)中的文件myid来知道它是哪个服务器 。该文件包含服务器编号,以ASCII格式显示。
最后,请注意每个服务器名称后面的两个端口号:“2888”和“3888”。
前端口(2888):一个ZooKeeper服务器使用这个端口来连接追随者到领导者,当新的领导者出现时,追随者使用此端口打开与领导者的TCP连接,zookeeper中的服务器之间的通信是通过此端口
进行的,例如可以以商定更新的顺序。
后端口(3888):领导的选举需要此端口,因为默认领导选举也使用TCP,所以我们目前需要另外一个端口进行领导选举。这是服务器条目中的第二个端口。
		注意
			如果要在单个计算机上测试多个服务器,请将服务器名称指定为localhost,在服务器的每个服务器上指定唯一的仲裁和前导选举端口(例如上述示例中的2888:3888,2889:3889,2890:3890)配置文件。
		当然,单独的dataDir和不同的clientPort也是必需的(在上面的复制示例中,在单个本地主机上运行,您仍然有三个配置文件)。
		请注意,在单个机器上设置多个服务器将不会产生任何冗余。如果发生导致机器死机的事情,所有的zookeeper服务器都将处于脱机状态。完全冗余要求每个服务器都有自己的机器。它必须是完全独立的物理服务器。同一物理主机上的多个虚拟机仍然容易受到该主机完全失败的影响。
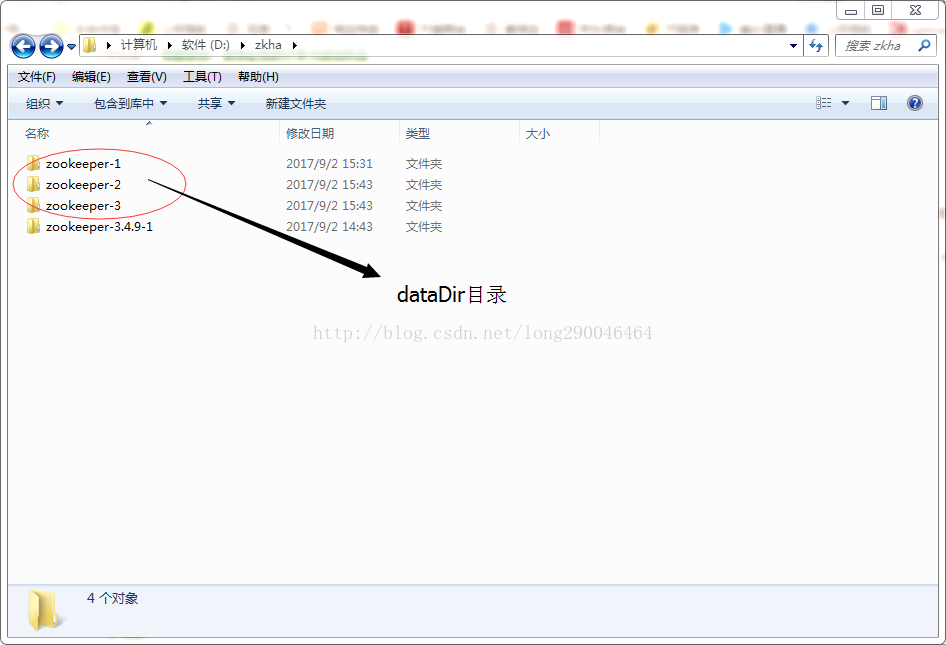
1.2 ?在dataDir目录下添加myid文件(注意不要添加任何后缀名),这个文件里边的内容只有一个数字对应配置文件中server.X中的X
1.3 ?配置三份不同的server启动脚本文件
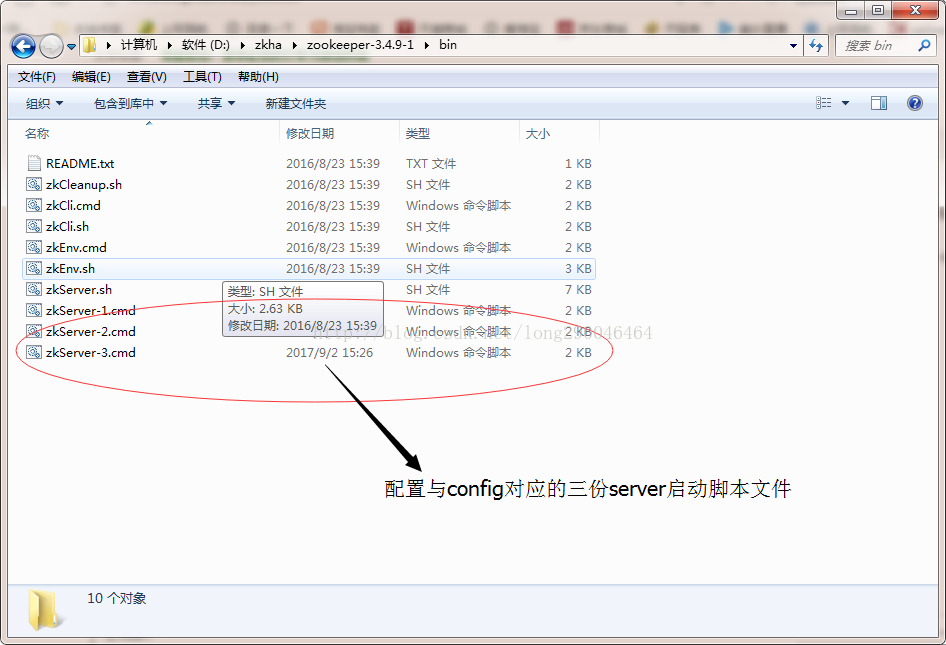
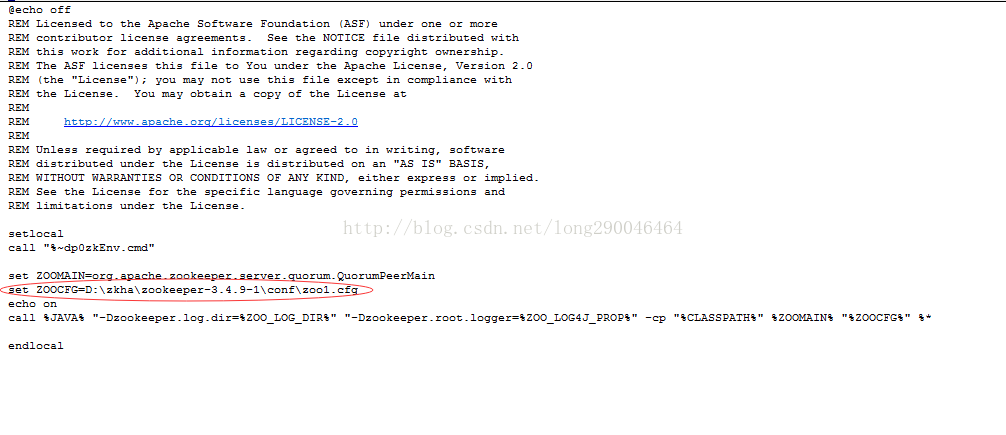
在bin目录下复制zkServer.cmd, 如下图所示,注意图里边红圈部分为要贴进来的内容(set ZOOCFG=D:\zkha\zookeeper-3.4.9-1\conf\zoo1.cfg);配置与zoo.cfg对应的三份zkServer.cmd即可
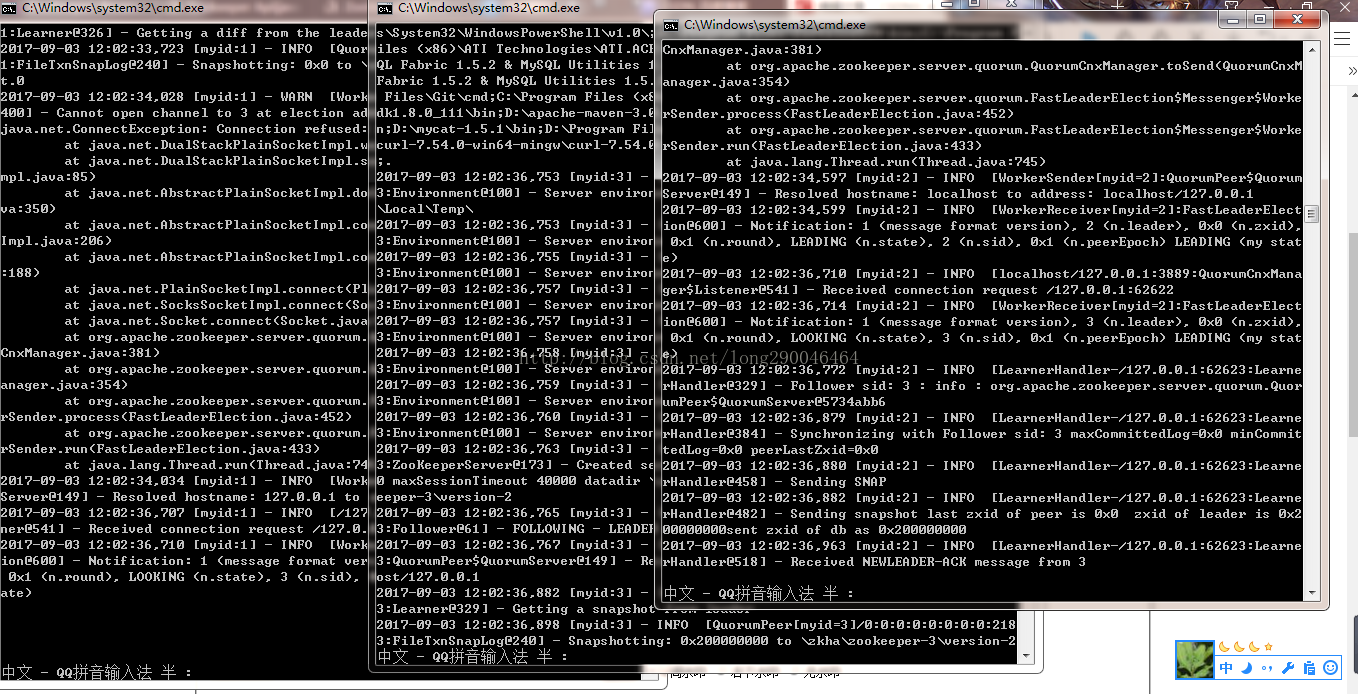
最后启动,第一次跟第二次启动会报节点找不到的错误,是因为其他节点还未启动的原因,不影响可忽略,将三个节点全部启动起来就好了,启动结果如下图所示
到此,第一种方式就算完成了,下面介绍第二种方式:
2 ?使用3份区分开来的zookeeper来模拟
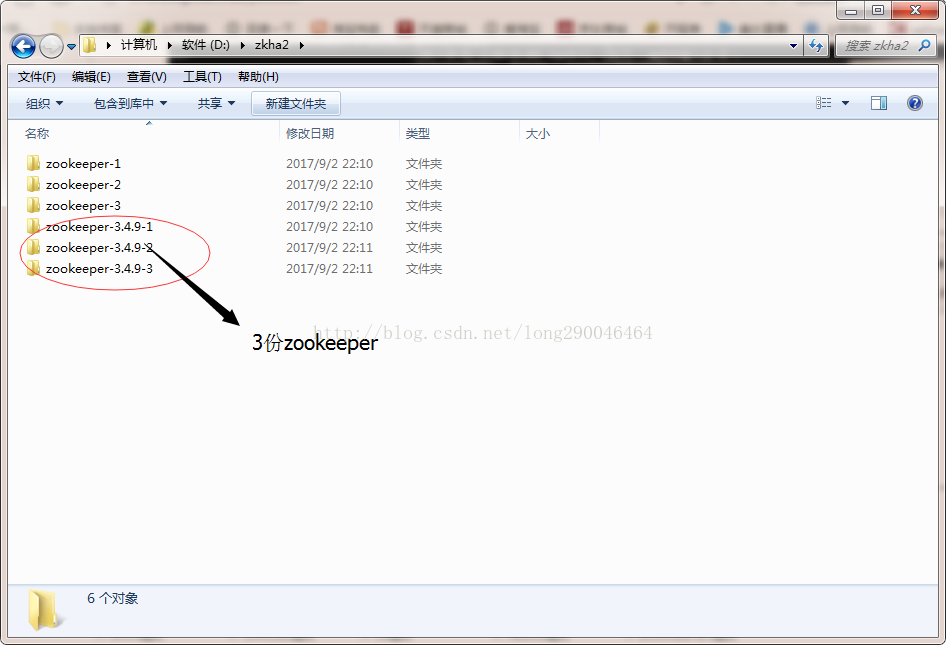
2.1 ?将第一种方式介绍中的三份zoo1.cfg、zoo2.cfg、zoo3.cfg复制到如上图对应的zookeeper中,并全部重命名为zoo.cfg,并修改里边dataDir的指向
2.2 ?将第一种方式介绍中的三份myid复制在对应的dataDir目录下
自此第二种方式就完成了,直接启动,结果如第一种方式中的效果。
cs