这篇博客将介绍如何使用Python,OpenCV对图像进行平移转换。平移是图像沿x轴和y轴的移动。使用平移,可以将图像上下左右移动,以及上述任意组合。要使用OpenCV平移图像,只需3步:
- 从磁盘加载图像
- 定义仿射变换矩阵
- 应用cv2.warpAffine仿射函数来执行平移
1. 效果图
用了颖宝明兰的新娘图片来演示效果~,喜欢这张图的原因,是这里有一首经典的催妆诗,
《催妆诗》
金车欲上怯东风,排云见月醉酒空。
独自仙姿羞半吐,冰瓷露白借微红。
原图如下:

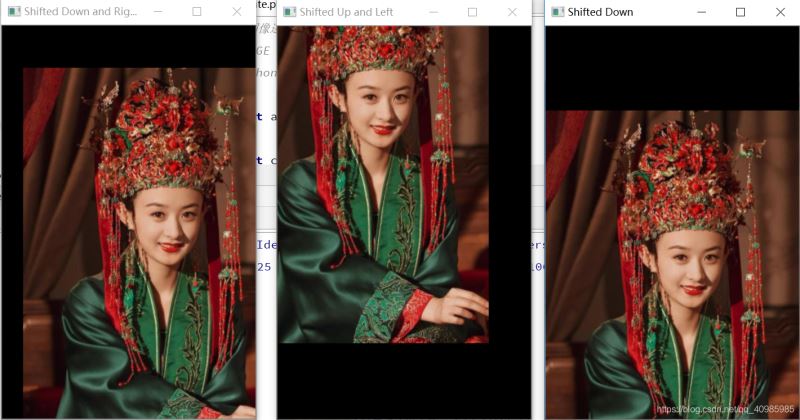
向右向下平移图 VS 向上向左平移图 VS 向下平移效果图如下:
2. 原理
转化矩阵
M = np.float32([
[1, 0, shiftX],
[0, 1, shiftY]
])
转换矩阵M被定义为浮点数组。 矩阵的第一行是[1,0,t{x}],其中t{x}是将图像向左或向右移动的像素数。t{x}的负值将使图像向左移动,正值将使图像向右移动。 矩阵的第二行定义为[0,1,t{y}],其中t{y}是将图像上下移动的像素数。t{y}的负值将使图像上移,正值将使图像下移。
3. 源码
# 对图像进行平移
# USAGE
# python opencv_translate.py
import argparse
import cv2
import imutils
# 导入必要的包
import numpy as np
# 构建命令行参数及解析
# --image 输入图像路径
ap = argparse.ArgumentParser()
ap.add_argument("-i", "--image", type=str, default="ml.jpg",
help="path to the input image")
args = vars(ap.parse_args())
# 从磁盘加载图像并显示
image = cv2.imread(args["image"])
image = imutils.resize(image, width=300)
cv2.imshow("Original", image)
# 将图像向右移动25像素,像下移动50像素
M = np.float32([[1, 0, 25], [0, 1, 50]])
shifted = cv2.warpAffine(image, M, (image.shape[1], image.shape[0]))
cv2.imshow("Shifted Down and Right", shifted)
# 修改图像向左移动50像素,向上移动90像素
M = np.float32([[1, 0, -50], [0, 1, -90]])
shifted = cv2.warpAffine(image, M, (image.shape[1], image.shape[0]))
cv2.imshow("Shifted Up and Left", shifted)
# 用一行代码实现平移――imutils.translate
shifted = imutils.translate(image, 0, 100)
cv2.imshow("Shifted Down", shifted)
cv2.waitKey(0)
cv2.destroyAllWindows()
参考
- https://www.pyimagesearch.com/2021/02/03/opencv-image-translation/
- imutils.translate 源码github~
jsjbwy