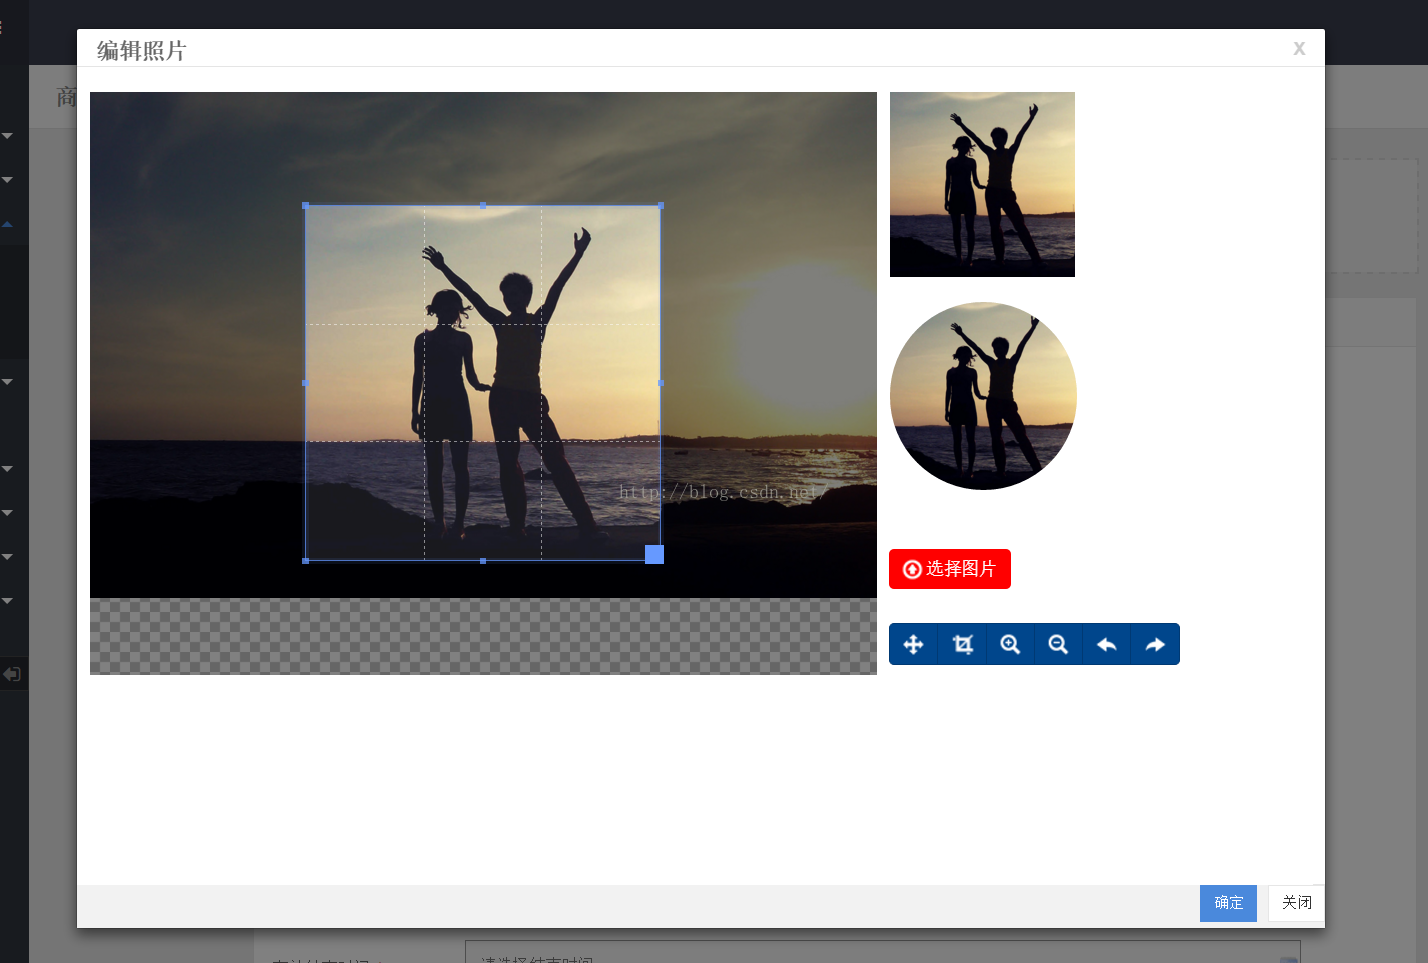
效果图预览:
用到的图片剪裁插件:http://www.htmleaf.com/jQuery/Image-Effects/201504211716.html
前段ui框架:bootstrap3
java后端框架:spring + mybstis
说明:如果前端ui用的不是bootstrap的框架,则调过第一步,直接将第二步的页面地址作为弹出框的地址即可,然后在做修改
1.首先说一下bootstrap的模态框:
一般的打开模态框要在页面上隐藏一段html代码然后用$("#Id").modal('show')显示模态框或者$("#Id").modal('hide')隐藏模态框,本人觉得有点麻烦,没有easyui这样的直接用js代码打开方便 ,所以我对这个模态框进行了封装。来实现直接用js打开的效果。原理很简单就是应以自定义一个jquery的方法,传递一些设置的参数,然后js动态生成html代码然后将代码追加到页面的body后面,然后在调用$("#Id").modal('show')方法来打开模态框。模态框里面的内容是动态的 所以就需要一个url地址加载页面的内容。下面来看js代码
bootstrap-utils.js
jQuery.extend({
?? ?//模态弹出框
?? ?openModel:function(options){
?? ??? ? var defaults={//设置默认参数
?? ??? ??? ??? ?title:'',//模态框的标题
?? ??? ??? ??? ?width:'100%',//模态框的默认宽度
?? ??? ??? ??? ?height:$(window).height()-130+"px",//模态框的默认高度,默认取浏览器的可视高度
?? ??? ??? ??? ?showOkButton:true,//是否显示确定按钮
?? ??? ??? ??? ?id:"model_js",//模态框id
?? ??? ??? ??? ?frameId:"modal_iframe",//iframeId
?? ??? ??? ??? ?okButtonContent:"确定",//确定按钮显示的内容
?? ??? ??? ??? ?cancelButtonContent:"关闭"//取消按钮显示的内容
?? ??? ? }
?? ??? ? var opts = $.extend(defaults,options);
?? ??? ? var str = "";
?? ??? ? str+="<div class='modal fade' id='"+opts.id+"' tabindex='-1' role='basic' aria-hidden='true'>";
?? ??? ? str+="?? ?<div class='modal-dialog'>";
?? ??? ? str+="?? ??? ?<div class='modal-content'>";
?? ??? ? if(opts.title != ""){
?? ??? ??? ? str+="?? ??? ?<div class='modal-header' style='height:30px;'>";
?? ??? ??? ? str+="?? ??? ??? ?<button type='button' class='close' data-dismiss='modal' aria-hidden='true' style='margin-top:-10px;'>x</button>";
?? ??? ??? ? str+="?? ??? ??? ?<h3 class='modal-title' style='margin-top:-10px;'><b>"+opts.title+"</b></h3>";
?? ??? ??? ? str+="?? ??? ?</div>";
?? ??? ? }
?? ??? ? str+="?? ??? ??? ?<div class='modal-body' style='padding:0px;'>";
?? ??? ? str+="?? ??? ??? ?</div>";
?? ??? ? str+="?? ??? ??? ?<div class='modal-footer' style='height:35px;padding:0px;'>";
?? ??? ? if(opts.showOkButton){
?? ??? ??? ? str+="?? ??? ??? ??? ?<button type='button' class='btn btn-primary? btn-sm' οnclick='"+opts.ok+"();'>"+opts.okButtonContent+"</button>";
?? ??? ? }
?? ??? ? str+="?? ??? ??? ??? ?<button type='button' class='btn btn-default? btn-sm' data-dismiss='modal'>"+opts.cancelButtonContent+"</button>";
?? ??? ? str+="?? ??? ??? ?</div>";
?? ??? ? str+="?? ??? ?</div>";
?? ??? ? str+="?? ?</div>";
?? ??? ? str+="</div>";
??????? //如果当前页面不选在当前id的模态框才追加模态框html
?? ??? ? if($("body").find("#"+opts.id+"").length == 0){
?? ??? ??? ? $("body").append(str);
?? ??? ? }else{
?? ??? ??? ? $("body").find("#"+opts.id+"").remove();
?? ??? ??? ? $("body").append(str);
?? ??? ? }
???????? //如果参数传递的宽度或者高度不是px格式的则加上px
?? ??? ? var height = (opts.height+"").indexOf("px") >= 0 ? opts.height : opts.height+"px";
?? ??? ? var width = (opts.width+"").indexOf("px") >= 0 || (opts.width+"").indexOf("%") >= 0 ? opts.width : opts.width+"px";
???????? //设置页面iframe的地址
?? ??? ? $("#"+opts.id+"").find(".modal-body").html("<iframe name='"+opts.frameId+"' style='width:99%;height:"+height+";border:0px;' scrolling='yes' src='"+opts.url+"'></iframe>");
?? ??? ? $("#"+opts.id+"").find(".modal-dialog").css({"width":width,"height":height});
???????? //显示模态框
?? ??? ? $("#"+opts.id+"").modal("show");
?? ?}
});
下面来看调用方式:
$.openModel({
?? ?url:'editPhoto.jsp',
?? ?frameId:'bLogoFrame',
?? ?id:'bLogoModel',
?? ?width:900,
?? ?ok:'getCropData'//点击确定按钮执行的函数
});
2.下面来看editPhoto.jsp
<%@ page language="java" contentType="text/html; charset=UTF-8"
??? pageEncoding="UTF-8"%>
<%@taglib prefix="c" uri="http://java.sun.com/jsp/jstl/core" %>
<%
??? request.setAttribute("ctx", request.getContextPath());
%>
<!DOCTYPE html>
<html>
<head>
<meta http-equiv="Content-Type" content="text/html; charset=UTF-8">
<!-- 引入剪裁插件的css-->
<link rel="stylesheet" type="text/css" href="${ctx}/business/js/crop/css/normalize.css" />
<link rel="stylesheet" type="text/css" href="${ctx}/business/js/crop/css/default.css">
<link href="${ctx }/business/js/crop/assets/css/bootstrap.min.css" rel="stylesheet">
<link href="${ctx }/business/js/crop/dist/cropper.css" rel="stylesheet">
<link href="${ctx }/business/js/crop/css/main.css" rel="stylesheet">
<!--[if IE]>
?? ?<script src="http://libs.useso.com/js/html5shiv/3.7/html5shiv.min.js"></script>
<![endif]-->
<style type="text/css">
td{vertical-align:top;padding-left:10px;}
.div_photo{
??? position:absolute;
??? width:150px;
?? ?height:150px;
?? ?border-radius:100px;
}
</style>
<!-- 引入剪裁插件的js-->
<script src="${ctx }/business/js/crop/assets/js/jquery.min.js"></script>
<script src="${ctx }/business/js/crop/assets/css/bootstrap.min.css"></script>
<script src="${ctx }/business/js/crop/dist/cropper.js"></script>
<script src="${ctx }/business/js/crop/js/main.js"></script>
<script type="text/javascript">
var data;
function getData(){
?? ?var result= $('#cropper-img').cropper("getCroppedCanvas");
?? ?data=result.toDataURL('image/jpeg',1);//获取剪裁的图片并且转为base64格式
??? $("#data").val(data);//将剪裁后的base64代码保存的隐藏域中
??? $("#isValidate").val(1);//设置是否校验通过
}
</script>
</head>
<body οnlοad="javascript:$('#cropper-img').cropper('setAspectRatio',1);"><!-- 初始化剪裁你插件的剪裁比例为1:1,如需要其他的查看文档修改-->
? <input style="display:none;" id="getData" οnclick="getData();" type="button" value="确定"/>
? <input id="isValidate" type="hidden" value="0"/>
? <input id="picName" type="hidden" value=""/>
? <input id="data" type="hidden" value=""/>
? <table style="margin-top:20px;">
? ?? ?<tr style="height:200px;">
? ?? ??? ?<td rowspan="3">
? ?? ??? ??? ?<div class="img-container" style="width:630px;height:400px;margin-left:0px;">
????????????????? <!-- 传递到这个页面的url不为空则显示要编辑的图片,否则显示默认的图片-->
? ?? ??? ??? ???? <c:choose>
? ?? ??? ??? ??? ??? ?<c:when test="${url != null and url !='' }">
? ?? ??? ??? ??? ??? ?<img id="cropper-img" src="${url }">
? ?? ??? ??? ??? ??? ?</c:when>
? ?? ??? ??? ??? ??? ?<c:otherwise>
? ?? ??? ??? ??? ??? ?<img id="cropper-img" src="${ctx }/res/img/upimg.jpg">
? ?? ??? ??? ??? ??? ?</c:otherwise>
? ?? ??? ??? ??? ?</c:choose>
?? ????? ??? ?</div>
? ?? ??? ?</td>
? ?? ??? ?<td>
? ?? ??? ??? ?<div class="docs-preview clearfix">
?? ?????????? <div class="img-preview preview-lg"></div>
?? ???????? </div>
? ?? ??? ??? ?<div class="docs-preview clearfix">
?? ?????????? <div class="img-preview preview-lg div_photo"></div>
?? ???????? </div>
? ?? ??? ?</td>
? ?? ?</tr>
? ?? ?<tr style="height:20px;">
? ?? ??? ?<td>
? ?? ??? ??? ?<div class="btn-group">
?? ?????????? <label class="btn btn-primary btn-upload" style="border:0px;background-color:red;" for="inputImage" title="Upload image file">
?? ???????????? <input class="sr-only" id="inputImage" name="file" type="file" accept="image/*">
?? ???????????? <span class="docs-tooltip pull-left" data-toggle="tooltip" title="选择文件">
?? ?????????????? <span class="icon icon-upload"></span>
?? ???????????? </span>
?? ???????????? <span class="pull-right"> 选择图片</span>
?? ?????????? </label>
?? ???????? </div>
? ?? ??? ?</td>
? ?? ?</tr>
? ?? ?<tr style="height:20px;">
? ?? ??? ?<td>
? ?? ??? ??? ?<div class="btn-group">
?? ?????????? <button class="btn btn-primary" data-method="setDragMode" data-option="move" type="button" title="移动">
?? ???????????? <span class="docs-tooltip" data-toggle="tooltip" title="$().cropper("setDragMode", "move")">
?? ?????????????? <span class="icon icon-move"></span>
?? ???????????? </span>
?? ?????????? </button>
?? ?????????? <button class="btn btn-primary" data-method="setDragMode" data-option="crop" type="button" title="裁剪">
?? ???????????? <span class="docs-tooltip" data-toggle="tooltip" title="$().cropper("setDragMode", "crop")">
?? ?????????????? <span class="icon icon-crop"></span>
?? ???????????? </span>
?? ?????????? </button>
?? ?????????? <button class="btn btn-primary" data-method="zoom" data-option="0.1" type="button" title="放大">
?? ???????????? <span class="docs-tooltip" data-toggle="tooltip" title="$().cropper("zoom", 0.1)">
?? ?????????????? <span class="icon icon-zoom-in"></span>
?? ???????????? </span>
?? ?????????? </button>
?? ?????????? <button class="btn btn-primary" data-method="zoom" data-option="-0.1" type="button" title="缩小">
?? ???????????? <span class="docs-tooltip" data-toggle="tooltip" title="$().cropper("zoom", -0.1)">
?? ?????????????? <span class="icon icon-zoom-out"></span>
?? ???????????? </span>
?? ?????????? </button>
?? ?????????? <button class="btn btn-primary" data-method="rotate" data-option="-45" type="button" title="向左旋转">
?? ???????????? <span class="docs-tooltip" data-toggle="tooltip" title="$().cropper("rotate", -45)">
?? ?????????????? <span class="icon icon-rotate-left"></span>
?? ???????????? </span>
?? ?????????? </button>
?? ?????????? <button class="btn btn-primary" data-method="rotate" data-option="45" type="button" title="向右旋转">
?? ???????????? <span class="docs-tooltip" data-toggle="tooltip" title="$().cropper("rotate", 45)">
?? ?????????????? <span class="icon icon-rotate-right"></span>
?? ???????????? </span>
?? ?????????? </button>
?? ???????? </div>
? ?? ??? ?</td>
? ?? ?</tr>
? </table>
</body>
</html>
说明:如果前端ui用的不是bootstrap,那么为了避免样式的冲突 可以用iframe的方式
例如:<a href="editPhotoInit.jsp">编辑头像</a>
editPhotoInit.jsp
<%@ page language="java" contentType="text/html; charset=UTF-8"
??? pageEncoding="UTF-8"%>
<%
String path = request.getContextPath();
String basePath = request.getScheme()+"://"+request.getServerName()+":"+request.getServerPort()+path+"/";
String serviceId = request.getParameter("serviceId");
%>
<iframe src="<%=path %>/editPhoto.jsp?serviceId=<%=serviceId %>" style="width:99%;height:100%;border:0px;overflow:hidden;"></iframe>
然后在用第三步的方法取iframe对象里的属性
3.点击确定按钮的时候在页面上显示剪裁后的图片
第一步中我们讲到打开模态框的方式为:
$.openModel({
?? ?url:'editPhoto.jsp',
?? ?frameId:'bLogoFrame',
?? ?id:'bLogoModel',
?? ?width:900,
?? ?ok:'getCropData'//点击确定按钮执行的函数
});
点击ok按钮后执行的函数
function getCropData(){
??????????? var obj = $(window.frames["bLogoFrame"].document);//获取当前模态框内容的iframe对象,id即为上面设置的iframeId.
??????????? obj.find("#getData").click();//因为不能直接获取子页面的方法和属性,所以就用间接的点击按钮或者链接的方法,然后再获取隐藏域的内容,方法有点笨 ,有好的方法可以修改
??????????? var isValidate = obj.find("#isValidate").val();//校验图片大小及尺寸,1.为校验通过,0.为不通过
??????????? if(isValidate == 1){
??????????????? var data = obj.find("#data").val();//获取剪裁后的base64图片
??????????????? $("#logo").attr("src",data);//直接将剪裁后的base64图片显示在img控件中
??????????????? var pos = data.indexOf("4")+2;
??????????????? data = data.substring(pos, data.length - pos);//去掉Base64:开头的标识字符
??????????????? $("#pic").val(data);//设置项后台提交的隐藏域的值,去掉base64开头的标示字符后的值
??????????????? //设置表单中图片为校验通过
??????????????? if(data != null && data != ""){
??????????????????? $("#addBusinessForm").bootstrapValidator('updateStatus', 'pic', 'VALID');
??????????????? }
??????????????? $("#bLogoModel").modal('hide');//关闭模态框
??????????? }
?}
如果用封装的方法打开模态框,获取模态框的值都需要这样取(获取iframe对象,然后在获取 iframe对象中的元素,属性或者方法只能用间接的方法取),但是我觉得还是比在页面中直接写模态框的代码还是简单可许多呢。
4.上传图片
在第三不我们已经把剪裁后的base64的并且去掉了头部的标示信息的数据已经放到隐藏域中了,需要注意的是,base64的图片格式的数据一般来说都比较大,一般的post传递按理说是不受长度限制的,但是有时候后还是会出现问题,后台取不到值为null的情况,所以我们采用
formData+ajax的方式进行表单提交,下面来看代码
为提交表单的按钮绑定事件
$("#submitForm").click(function(){
???? var $form = $("#myForm");//获取当前form对象
???? var bv = $form.data('bootstrapValidator');//获取bootstrap表单校验对象
?? ? var formData = new FormData($form[0]);//转换成formData对象
???? //可以为formData添加数据,例如 :formData.append("file",?$("#file_upload")[0].files[0]);
???? bv.validate();//校验表单
??? if(bv.isValid()){
?????????? ??? ?? $(obj).addClass('disabled');//置提交按钮为不可用,防止多次点击
?????????? ??? ?? $.ajax({ ?
????????????????????? url : $form.attr('action'),? //获取form表单的提交地址
????????????????????? type : 'POST', ?
????????????????????? async: false,
????????????????????? data : formData,
????????????????????? /**? ?
?????????????????????? * 必须false才会避开jQuery对 formdata 的默认处理? ?
?????????????????????? * XMLHttpRequest会对 formdata 进行正确的处理
?????????????????????? */ ?
????????????????????? processData : false, ?
????????????????????? /**? ?
?????????????????????? *必须false才会自动加上正确的Content-Type? ?
?????????????????????? */ ?
????????????????????? contentType : false, ?
????????????????????? success : function(data) {
????????????????????????? var id = data.id;
????????????????????????? var opType = data.opType;//操作类型,1.编辑,0.添加
???????????????????? ??? ?if(data.result == "1"){
???????????????????? ??? ??????? alert("提交成功");
????????????????????????? }else{
???????????????????????? ??? ?? alert(data.message);//显示错误信息
???????????????????? ??? ? ??? ?$(obj).removeClass('disabled');
????????????????????????? }
????????????????????? },error:function(){
?????????????????? ??? ??? ?alert("网络异常,请重试!");
???????????????????? ??? ? ??? ?$(obj).removeClass('disabled');
????????????????????? }
????????????????? });
???? }else{
?????????? ??? ?? alert("表单数据不完整!");
???? }
});
后端代码,上传到七牛(与阿里云类似),如果上传到本地请查看第五步:
//获取上传到七牛的图片地址
String fileBusLogoPath = new QiniuUpload().base64Upload(‘前段传过来的base64格式’, ‘upload/photo/logo’);
说明:upload/photo/logo为logo上传地址,可以配置到属性配置文件中
比如:
systemConfig.properties
#七牛访问地址
qiniuUrl:http://7xsrph.com2.z0.glb.qiniucdn.com
#文件上传根目录
base_path:D:/image/
#商家logo上传地址
logo_path:upload/logo/
#商家二维码大小
qrcode_size:1000
怎么获取属性配置文件的值呢,这个需要在框架启动的时候把属性配置文件的值读取到java对象中,在spring配置文件的配置加如下代码:
spring.xml
??? <!-- ?? ?加载系统配置文件 -->
??? <bean id="configBean"? class="com.util.CustomizedPropertyConfigurer">
?? ??? ?<property name="locations">
?? ??? ??? ?<list>
?? ??? ??? ??? ?<value>classpath:systemConfig.properties</value>
?? ??? ??? ?</list>
?? ??? ?</property>
?? ?</bean>
CustomizedPropertyConfigurer.java
import java.util.HashMap;
import java.util.Map;
import java.util.Properties;
import org.springframework.beans.BeansException;
import org.springframework.beans.factory.config.ConfigurableListableBeanFactory;
import org.springframework.beans.factory.config.PropertyPlaceholderConfigurer;
public class CustomizedPropertyConfigurer extends PropertyPlaceholderConfigurer { ?
?? ? ?
??? private static Map<String, Object> ctxPropertiesMap; ?
?
??? @Override ?
??? protected void processProperties(ConfigurableListableBeanFactory beanFactory, ?
??????????? Properties props)throws BeansException { ?
?
??????? super.processProperties(beanFactory, props); ?
??????? //load properties to ctxPropertiesMap ?
??????? ctxPropertiesMap = new HashMap<String, Object>(); ?
??????? for (Object key : props.keySet()) { ?
??????????? String keyStr = key.toString(); ?
??????????? String value = props.getProperty(keyStr); ?
??????????? ctxPropertiesMap.put(keyStr, value); ?
??????? } ?
??? } ?
?
??? //static method for accessing context properties ?
??? public static Object getContextProperty(String name) { ?
??????? return ctxPropertiesMap.get(name); ?
??? } ?
?? ?
}
这样就可以通过CustomizedPropertyConfigurer类来获取属性配置文件的值
上传代码可以改为:
//获取logo上传路径
String logoPath = (String)CustomizedPropertyConfigurer.getContextProperty("logo_path");
String fileBusLogoPath = new QiniuUpload().base64Upload(‘前段传过来的base64格式’,logoPath);
然后将 fileBusLogoPath这个地址更新到数据库字段中,数据库保存的字段格式为:upload/logo/201605231403202561.jpg
显示给页面要拼接上七牛的访问地址:
图片完整的路径为:
String qiniuUrl = (String)CustomizedPropertyConfigurer.getContextProperty("qiniuUrl");
String logUrl = qiniuUrl+"/"+fileBusLogoPath;//图片完整路径
七牛上传工具类:QiniuUpload.java
import java.awt.image.BufferedImage;
import java.io.ByteArrayOutputStream;
import java.io.File;
import java.io.FileInputStream;
import java.io.FileNotFoundException;
import java.io.IOException;
import java.net.URL;
import java.text.SimpleDateFormat;
import java.util.Date;
import java.util.Random;
import javax.imageio.ImageIO;
import sun.misc.BASE64Decoder;
import com.qiniu.common.QiniuException;
import com.qiniu.http.Response;
import com.qiniu.storage.UploadManager;
import com.qiniu.util.Auth;
public class QiniuUpload {
?? ?private final String accessKey = "";
?? ?private final String secretKey = "";
?? ?private final String bucketname = "test";
?? ?private final String qiniuUrl = "http://7xsrph.com2.z0.glb.qiniucdn.com";//七牛地址
?? ?//密钥配置
??? Auth auth = Auth.create(accessKey, secretKey);
??? //创建上传对象
??? UploadManager uploadManager = new UploadManager();
??? //简单上传,使用默认策略,只需要设置上传的空间名就可以了
?? ?public String getUpToken(){
?? ???? return auth.uploadToken(bucketname);
?? ?}
?? ?/**
?? ? * 字节流上传
?? ? * @param bytes
?? ? * @param filePath
?? ? * @return
?? ? * @throws IOException
?? ? */
?? ?public String upload(byte[] bytes,String filePath) throws IOException{
?? ???? try {
?? ??? ??? ?
?? ??? ??? ?String fileName = filePath+getFileName();
?? ??? ??? ?//调用put方法上传
?? ??? ??? ?Response res = uploadManager.put(bytes, fileName, getUpToken());
?? ??? ??? ?return fileName;
?? ?????? } catch (QiniuException e) {
?? ?????????? Response r = e.response;
?? ?????????? // 请求失败时打印的异常的信息
?? ?????????? System.out.println(r.toString());
?? ?????????? try {
?? ?????????????? //响应的文本信息
?? ?????????????? System.out.println(r.bodyString());
?? ?????????? } catch (QiniuException e1) {
?? ?????????????? //ignore
?? ?????????? }
?? ?????? }
?? ??? ?return null;????? ?
?? ?}
?? ?/**
?? ? * base64格式图片上传
?? ? * @param base64
?? ? * @param filePath
?? ? * @return
?? ? * @throws IOException
?? ? */
?? ?public String base64Upload(String base64,String filePath) throws IOException{
?? ??? ?try {
?? ??? ??? ?BASE64Decoder decoder = new BASE64Decoder();
?? ??? ??? ?// Base64解码
??????????? byte[] bytes = decoder.decodeBuffer(base64);
??????????? for (int i = 0; i < bytes.length; ++i) {
??????????????? if (bytes[i] < 0) {// 调整异常数据
??????????????????? bytes[i] += 256;
??????????????? }
??????????? }
?? ??? ??? ?String fileName = filePath+getFileName();
?? ??? ??? ?//调用put方法上传
?? ??? ??? ?Response res = uploadManager.put(bytes, fileName, getUpToken());
?? ??? ??? ?return fileName;
?? ??? ?} catch (QiniuException e) {
?? ??? ??? ?Response r = e.response;
?? ??? ??? ?// 请求失败时打印的异常的信息
?? ??? ??? ?System.out.println(r.toString());
?? ??? ??? ?try {
?? ??? ??? ??? ?//响应的文本信息
?? ??? ??? ??? ?System.out.println(r.bodyString());
?? ??? ??? ?} catch (QiniuException e1) {
?? ??? ??? ??? ?//ignore
?? ??? ??? ?}
?? ??? ?}
?? ??? ?return null;????? ?
?? ?}
?? ?/**
?? ? * 创建待logo的二维码
?? ? * @param filePath
?? ? * @param text
?? ? * @return
?? ? * @throws IOException
?? ? */
?? ?public String createQrcode(String filePath,String text) throws IOException{
?? ??? ?try {
//?? ??? ??? ?fileBusLogoPath.replace(".", "_qrCode.")
?? ??? ??? ?URL url = new URL(qiniuUrl+"/"+filePath);
//?? ???????? URLConnection conn = url.openConnection();
//?? ???????? urlcon.connect();???????? //获取连接
?? ??????? ?
?? ??? ??? ?BufferedImage bufferedImg = ImageIO.read(url);
?? ??? ??? ?int width = bufferedImg.getWidth();
?? ??? ??? ?
?? ??? ??? ?String fileName = filePath.replace(".", "_qrCode.");
?? ??? ??? ?BufferedImage bi = null;
?????? ??? ?BufferedImage logo = null;
?????? ??? ?
?? ??? ??? ?logo = ImageUtils.resizeImage1(bufferedImg,100, 0.9f, true);
?? ??? ??? ?bi = QrCodeUtil.createQrCode(logo,text,width,width);
?? ??? ??? ?
?? ??? ??? ?ByteArrayOutputStream os = new ByteArrayOutputStream();
?? ??? ??? ?ImageIO.write(bi, "jpg", os);
?? ??? ??? ?//调用put方法上传
?? ??? ??? ?Response res = uploadManager.put(os.toByteArray(),fileName, getUpToken());
?? ??? ??? ?System.out.println(res.toString());
?? ??? ??? ?return fileName;
?? ??? ?} catch (QiniuException e) {
?? ??? ??? ?Response r = e.response;
?? ??? ??? ?// 请求失败时打印的异常的信息
?? ??? ??? ?System.out.println(r.toString());
?? ??? ??? ?try {
?? ??? ??? ??? ?//响应的文本信息
?? ??? ??? ??? ?System.out.println(r.bodyString());
?? ??? ??? ?} catch (QiniuException e1) {
?? ??? ??? ??? ?//ignore
?? ??? ??? ?}
?? ??? ?}