????????ЮвУЧЧАУцНВНтСЫгаЙиspringbootЕФжЊЪЖЕу,СЫНтЕНspringbootВЛЪЧвЛИіПђМм,ЖјЪЧвЛИіПђМмЕФДюНЈММЪѕ,ФПЕФЪЧЮЊСЫМђЛЏSpringгІгУЕФГѕЪМДюНЈвдМАПЊЗЂЙ§ГЬЁЃМШШЛЮвУЧвЊЪЙгУspringbootзіЯюФП,ФЧЕзВуЕФЪЙгУ,ЮвУЧШчЙћЛЙЪЧЪЙгУJDBCЕФЛА,ЛсБШНЯТщЗГ,жкЫљжмжЊ,MyBatisЪЧЬцДњЕзВуJDBCЕФвЛИіММЪѕ,Ыљвд,НёЬьЮвУЧНщЩмspringbootШчКЮетИіMyBatisЁЃ
ЕквЛВН:в§ШывРРЕ
????????дкpomЮФМўжав§ШыСНИівРРЕ,ЕквЛИіЪЧгыMyBatisЯрЙиЕФвРРЕ,ЕкЖўИіЪЧгыMySQLЪ§ОнПтЯрЙиЕФвРРЕЁЃШчЯТЭМЫљЪО:
<dependency>
<groupId>org.mybatis.spring.boot</groupId>
<artifactId>mybatis-spring-boot-starter</artifactId>
<version>2.0.1</version>
</dependency>
<dependency>
<groupId>org.springframework.boot</groupId>
<artifactId>spring-boot-starter-jdbc</artifactId>
</dependency>
ЕкЖўВН:БраДХфжУ
????????ДЫЪБspringbootвбОЭЈЙ§здЖЏХфжУ,ЩњГЩСЫЯЕЭГЫљашЕФMapperScannerConfigurerзщМў,ВЂИјзщМўзЂШыСЫDataSource,ПЊЗЂШЫдБашвЊдкapplication.ymlЮФМўжаХфжУmybatisЕФвЛаЉБивЊХфжУМДПЩ,Р§Шч:Ъ§ОндДЁЂmapperЮФМўКЭНгПкЕФЮЛжУЁЂБ№УћЕШЕШЁЃШчЯТЭМЫљЪО:
spring:
datasource:
username: root
password: root
driver-class-name: com.mysql.cj.jdbc.Driver
url: jdbc:mysql://127.0.0.1:3306/cvs_db?useUnicode=true&characterEncoding=utf8&serverTimezone=Asia/Shanghai
mybatis:
type-aliases-package: com.example.demo.pojo
mapper-locations: classpath:mybatis/mapper/*.xml
????????ЩЯУцУЛгаЫЕУїmapperНгПкЕФХфжУЗНЪН,ЫќЕФХфжУЗНЪНВЛЪЧдкymlЮФМўжаХфжУЕФ,ЖјЪЧЭЈЙ§СНИізЂНтЭъГЩЕФ,ШчЯТ:
????????1,@Mapper:БъзЂЕНmapperНгПкЩЯМДПЩ
????????2,@MapperScan:БъзЂЕНЦєЖЏРрЩЯ,ЛђепФГИіХфжУЩЯ(МДБЛ@ConfigurationБъзЂЕФРр)
ЕкШ§ВН:БраДmapperНгПквдМАгГЩфЮФМў
????????етвЛВНОЭВЛЯъЯИЫЕСЫ,ДѓМвПЯЖЈЖМЪЧЗЧГЃЪьЯЄСЫ,жБНгЩЯДњТыСЫЁЃ
@Mapper
@Component
public interface UserMapper {
public List<User> getUserList();
public int addUser(User user);
public int updateUser(User user);
public int deleteUser(User user);
}
<?xml version="1.0" encoding="UTF-8" ?>
<!DOCTYPE mapper
        PUBLIC "-//mybatis.org//DTD Mapper 3.0//EN"
        "http://mybatis.org/dtd/mybatis-3-mapper.dtd">
<mapper namespace="com.example.demo.mapper.UserMapper">
    <insert id="addUser">
        insert into user (id,name,pwd) value (#{id},#{name},#{pwd})
    </insert>
    <update id="updateUser">
        update user set pwd=#{pwd},name=#{name} where id=#{id}
    </update>
    <delete id="deleteUser">
        delete from user where id=#{id}
    </delete>
    <select id="getUserList" resultType="com.example.demo.pojo.User">
        SELECT * from user
    </select>
</mapper>
@RestController
public class UserController {
    @Autowired
    UserServiceImpl userService;
    @RequestMapping("/getUserList")
    public List<User> getUserList(){

        return userService.getUserList();

    }
}
????????зЂвт:mapperгГЩфЮФМўУЛгааДдкsrcФПТМЯТ,аДдкСЫresourcesФПТМЯТЁЃ
????????зюКѓЦєЖЏвЛЯТЦєЖЏРр,ШЛКѓдйфЏРРЦїЗУЮЪвЛЯТМДПЩ,ЮветРяЗУЮЪжЎКѓ,ГіРДСЫаЇЙћ,ШчЯТЭМ:
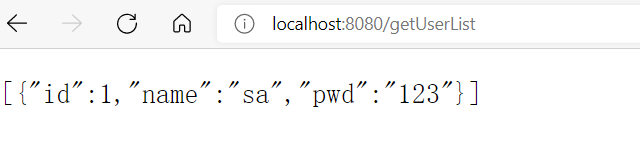
????????ФФвЛВНВЛЬЋУїАзСЫ,ДѓМвПЩвддкЦРТлЯТУцДђГіРД,ЮвУЧдквЛЦ№ЬжТлЁЃ
cs